Simple Guide on Installing & Configuring a Windows 2016 Certification Authority Server
 A Windows Active Directory Certification Authority server (AD CA), also known as a Certificate Authority, is an essential service to every organization’s Active Directory as it can manage, issue, revoke and renew digital certificates used to verify the identity of users, computers and other network services.
This guide will show you how to quickly install and setup a Certification Authority server on Windows 2016 server. The guide includes the installation of the Certification Authority Web Enrollment service to allow your organization to request, renew and download certificates via a simple web interface.
Execution Time: 10 - 15 minutes
Step 1 – Installation of Windows Active Directory Certificate Services
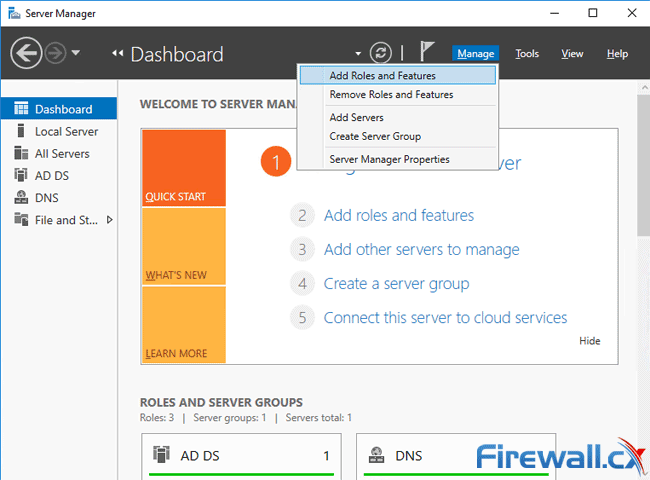
Launch Server Manager and go to Manage > Add Roles and Features:
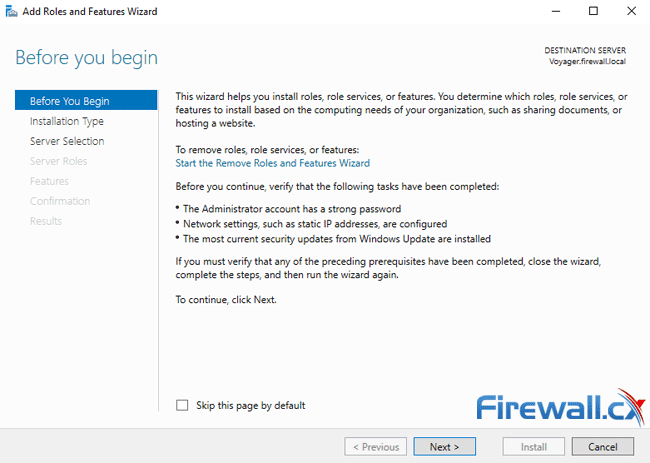
At the next screen select simply click on the Next button:
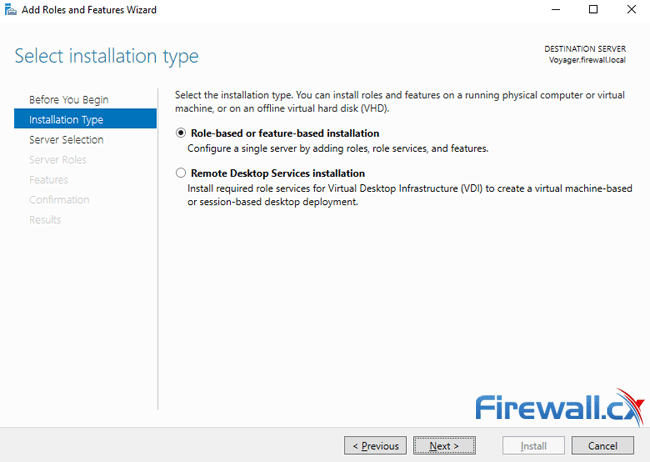
Ensure Role-based or feature-based installation is selected and click on Next:
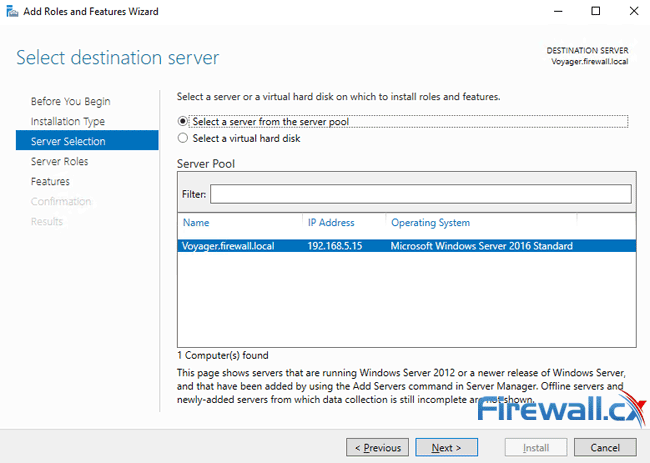
At the next screen select the destination server from the available Server Pool and click on the Next button:
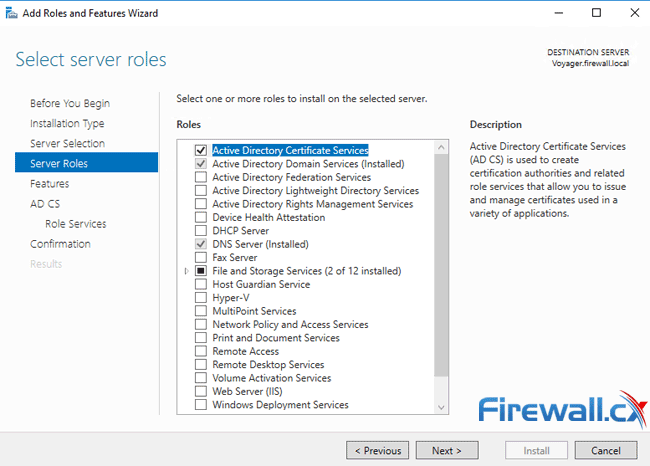
Next, tick the Active Directory Certificate Services from the available roles:
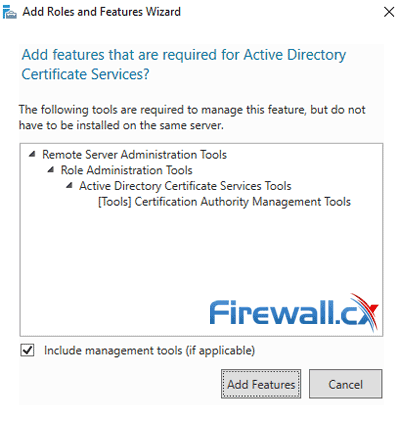
The Add Roles and Features Wizard will immediately pop up a new window requiring you to confirm the installation of additional tools needed to manage the CA feature. To confirm, click on the Add Features button:
You will now return to the previous window. Simply click on the Next button to continue.
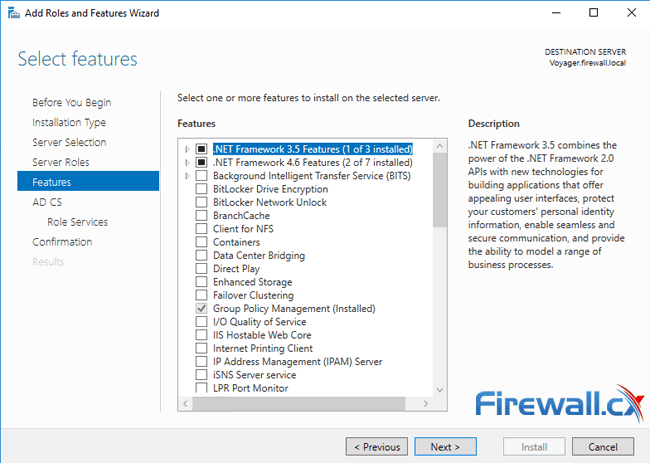
At the Select Features window just click on the Next button:
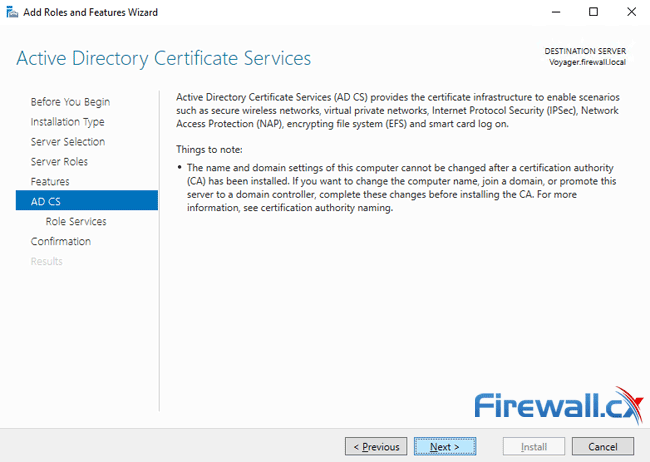
The next section is around the Certificate Services we want to install. The initial window warns that once the computer/server name cannot be changed after a certification authority (CA) has been installed. Take a moment to read through the information and click on Next when ready:
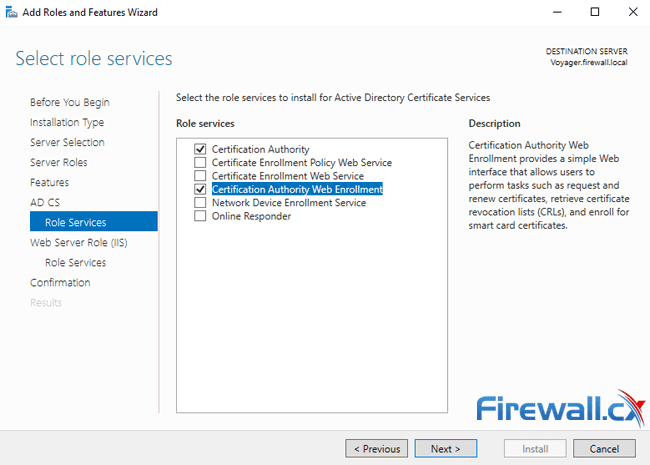
The next window allows you to select the desired Certification Authority services to be installed. The first one, Certification Authority is selected by default however it is advisable to also select the Certification Authority Web Enrollment feature as it will provide a simple web interface from where you can submit certificate signing requests, download certificates and more.
As soon as the Certification Authority Web Enrollment feature is selected a pop up window will appear requesting confirmation to install additional features needed. Click on Add Features:
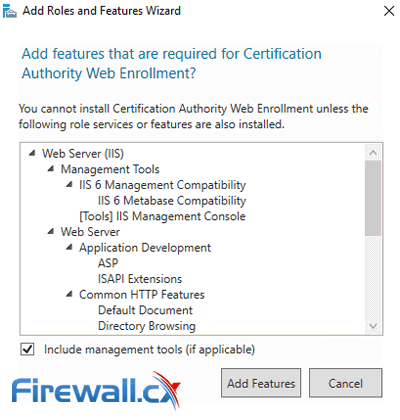
You’ll now be returned back to the previous window, click on Next to continue.
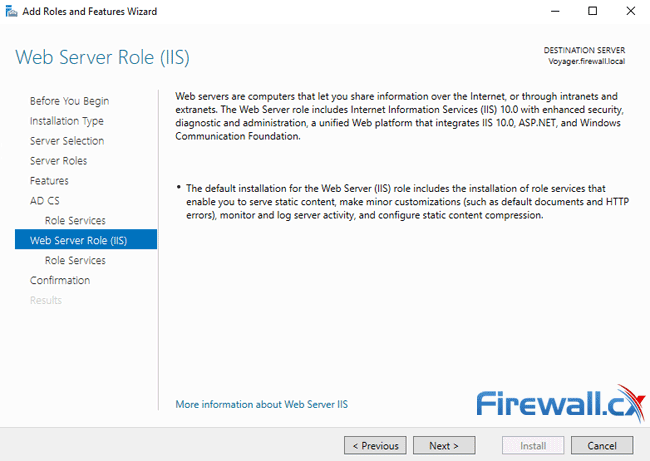
The next screen is required for the installation of IIS Web Services. If you already have IIS installed, you won’t need to run through these steps. Click on Next to continue:
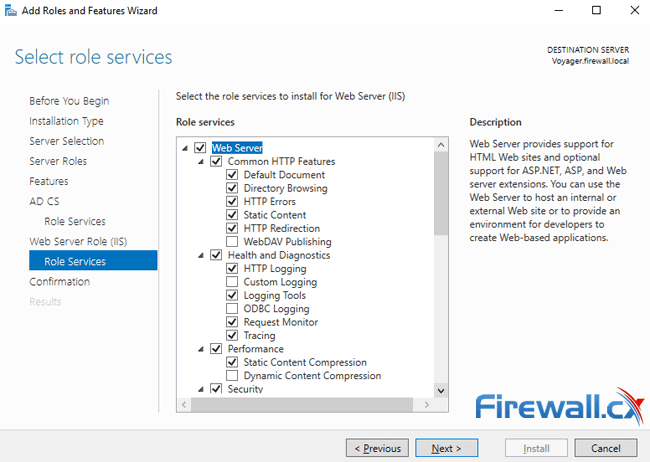
At the next screen, IIS Web Server options, we can easily accept the default selected services. Feel free to scroll down and check the available options otherwise simply click on Next to continue:
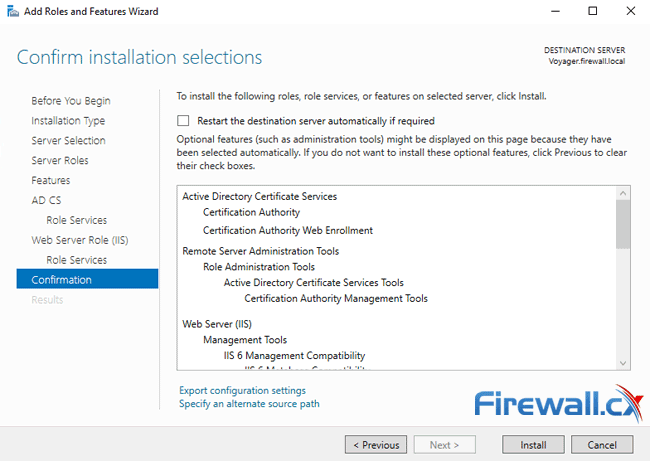
The final window is a simple confirmation of all selected services and features. Note the automatic restart option at the top – it’s advisable not to use it as the Window Server might restart once installation is complete.
When ready, click on the Install button to begin the installation:
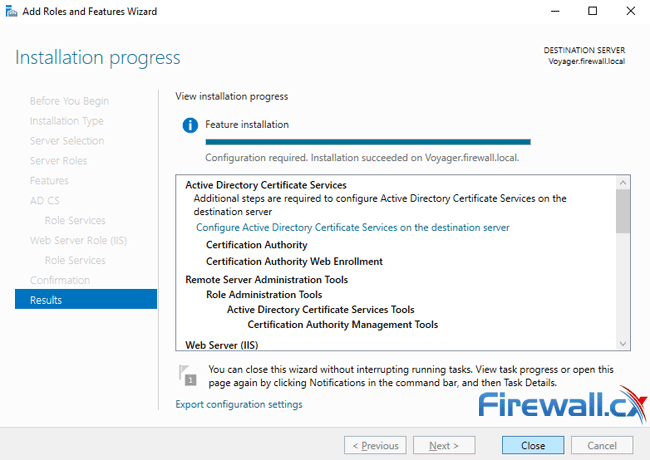
Installation can take from 5 to 10 minutes depending on how busy the server is. Once complete it is necessary to configure Active Directory Certificate Services on the destination server by clicking on the link provided at the end of the installation wizard:
Step 2 - Configuring Active Directory Certificate Services (AD CS)
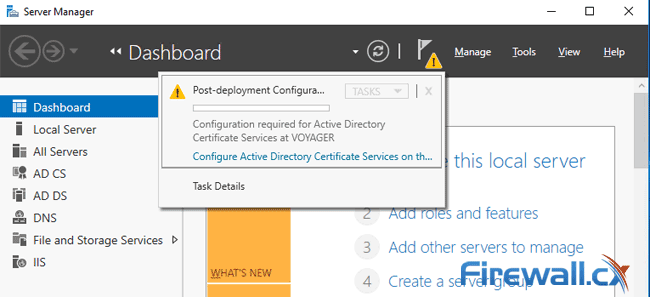
Configuring Active Directory Certificate Services is a simple and quick process. You can initiate this process from the previous step or from the Server Manager Dashboard by clicking on the exclamation mark and selecting Configure Active Directory Certificate Services on the destination server:
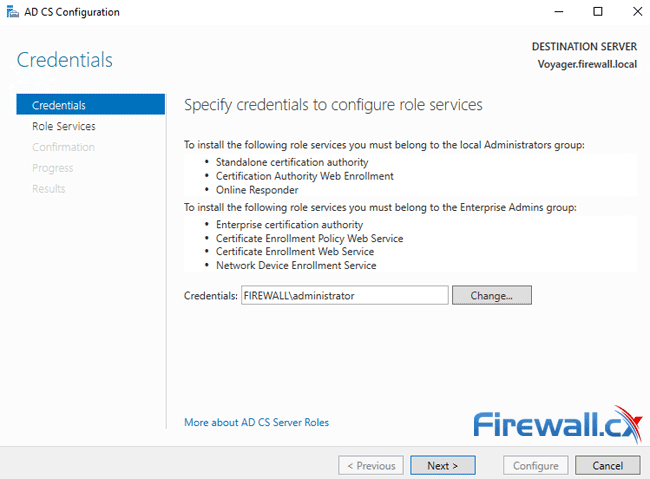
Once the configuration process is initiated, the system will require credential confirmation to install the necessary role services. Enter a username that belongs to the Local and Enterprise Admin group. By default the Administrator username will appear. When ready click on Next:
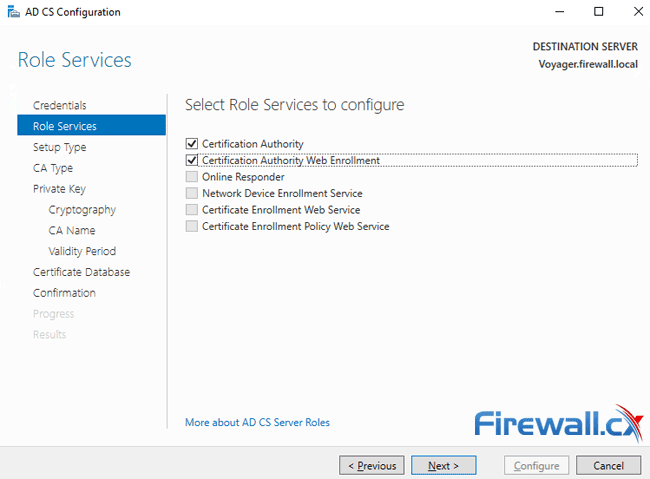
Next, select the Role Services to be configured. The two services available for us are Certification Authority and Certification Authority Web Enrollment. Select them both and click on Next:
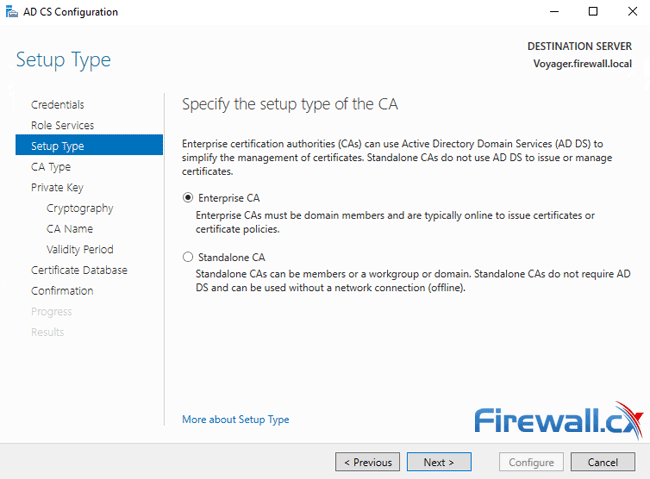
At the next screen select Enterprise CA (default) as CA setup type and click on Next:
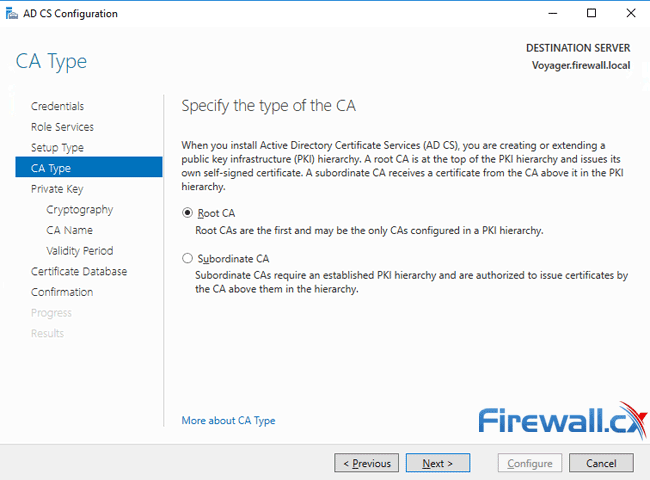
Next, assuming this is the first and possibly only CA in your organisation, select Root CA (default) as the type of CA and click on Next:
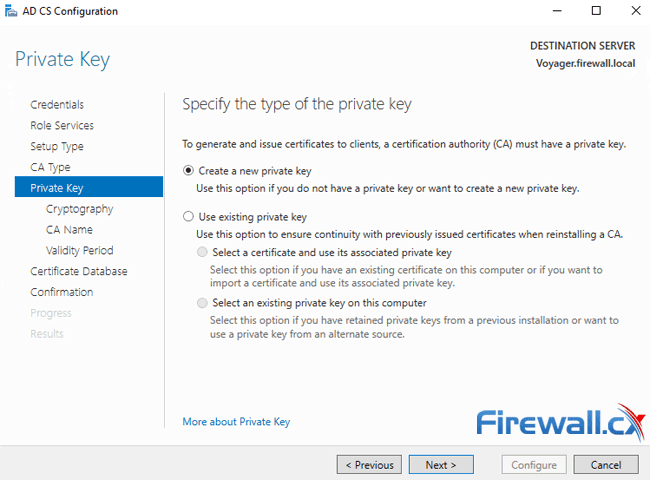
Next, we will create a new private key (default option) and click on Next to configure its options:
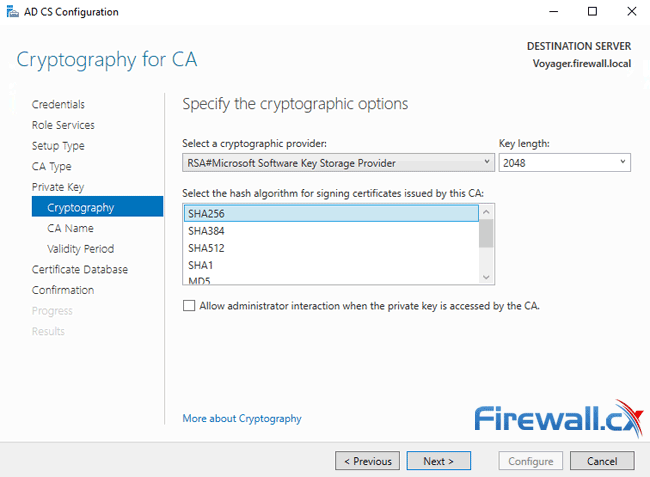
On the next screen we can leave all options to their default settings and continue. Alternatively a different hash algorithm can be selected e.g SHA384 or SHA512 with a larger Key Length. When ready, click on Next:
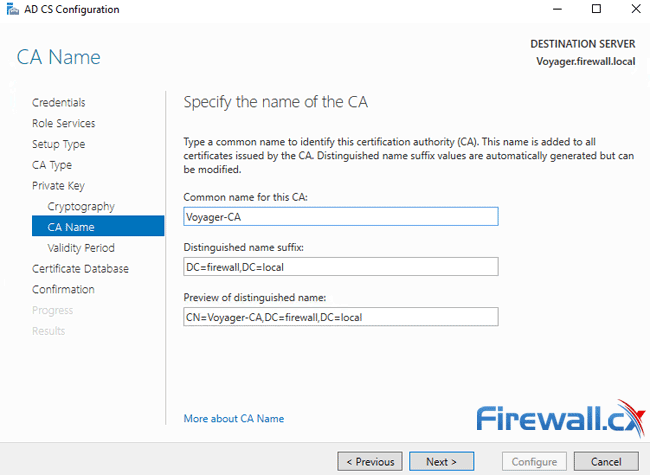
Here we can change or leave the suggested Common Name (CN) for our Certification Authority (CA). When ready, click on Next:
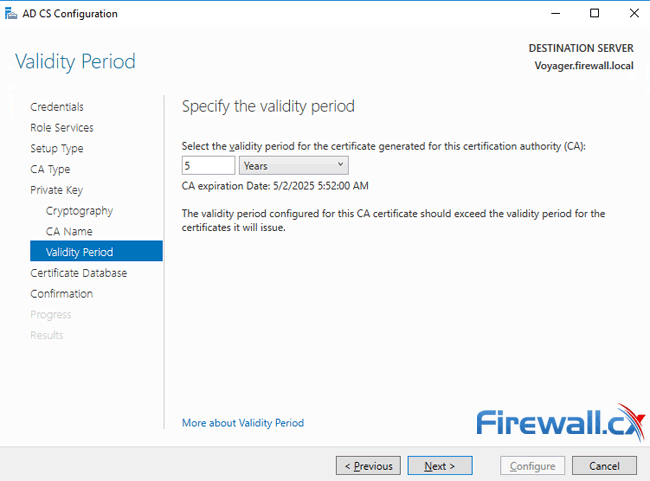
The Validity Period determines how long the certificate generated for our CA will be valid. By default this is 5 years however it can be adjusted either way. Enter the desirable amount of years and click on Next:
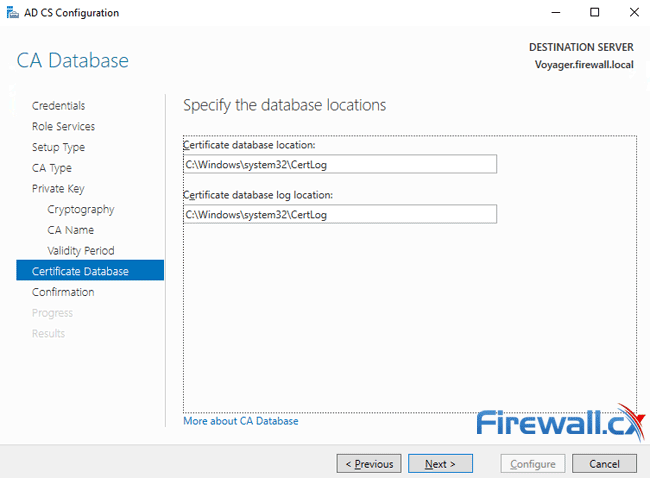
Last option is the configuration of the database locations. Accept the default locations and click on Next:
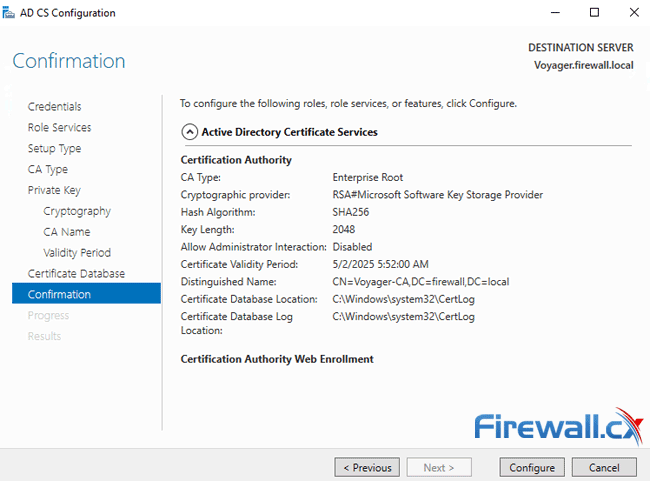
Finally, we are presented with a confirmation window with all settings. This is the last chance to change any settings or values. When ready, click on Configure:
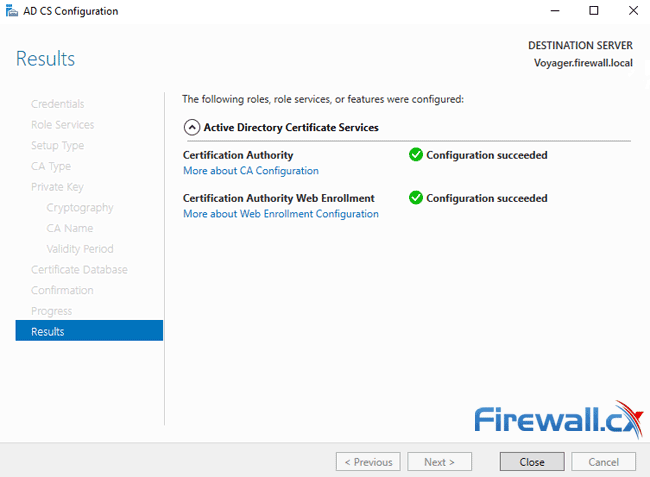
After a few seconds the Results window will appear confirming all roles, services and features have been successfully configured. Click on Close to exit the configuration wizard:
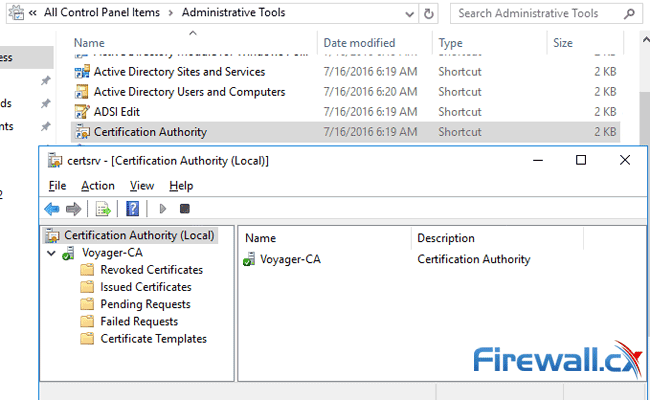
We’ll now find the Certificate Authority MMC available in the Administrative Tools:
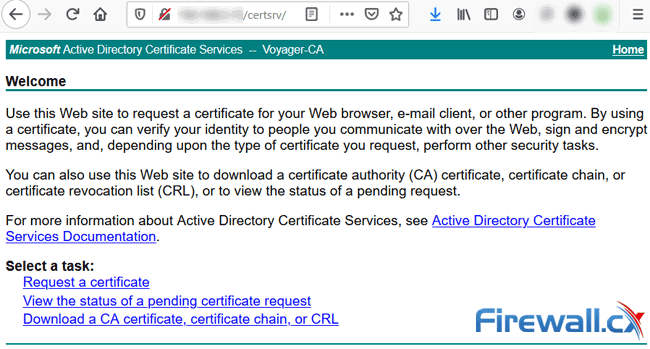
We can also visit the CA Server’s web site to request and download signed certificates by visiting the URL: http://<server IP>/certsrv e.g http://192.168.1.10/certsrv:
Summary
This article explained the role and importance of a Windows Certificate Authority Server provided a step-by-step guide how to install and configure a Windows 2016 Certification Authority Server including the Certification Authority Web Enrollment component.
Your IP address:
160.79.110.162
Wi-Fi Key Generator
Follow Firewall.cx
Cisco Password Crack
Decrypt Cisco Type-7 Passwords on the fly!


