How to Install and Configure SNMP for Windows Server 2016
Simple Network Management Protocol (SNMP) is a UDP protocol that uses port 161 to monitor and collect detailed information on any network device supporting the SNMP protocol. All Windows servers support SNMP and we’ll show you how to easily install and configure SNMP on your Windows 2016 or 2012 server, including Read Only (RO) or Read Write (RW) SNMP community string.
In our example we will enable the SNMP agent and configure a SNMP community string to allow our Network Monitoring System (NMS) monitor our server resources.
Execution Time: 10 minutes
Step 1 – Install SNMP on Windows Server 2016
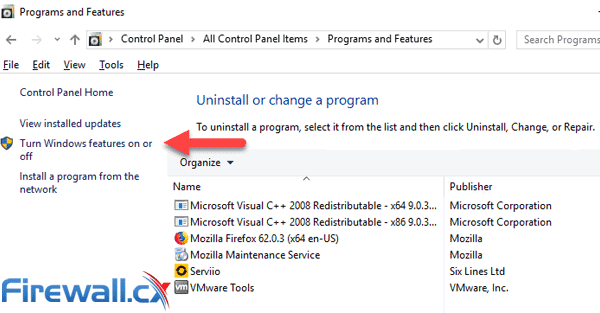
Open the Control Panel on your Windows Server and Double-click on the Program and Features icon:
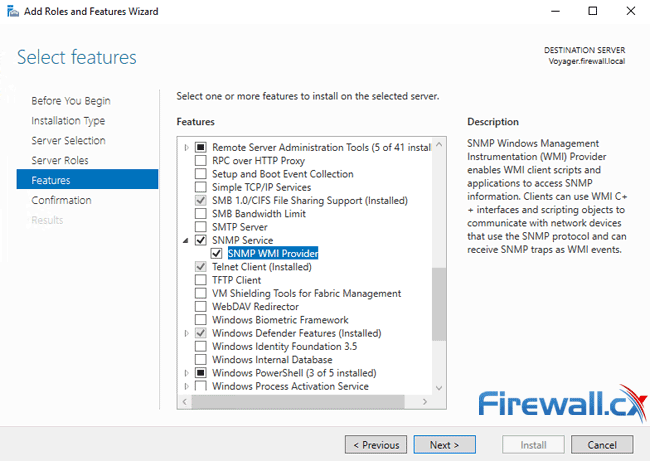
This will open the Add Roles and Features Wizard. Keep clicking on the Next button until you reach the Features section. From there, select the SNMP Service option:
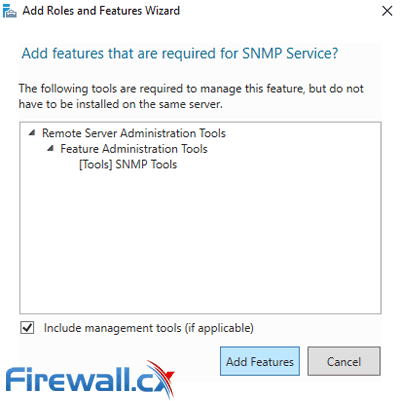
When prompted, click on the Add Features button to include the installation of the Administration SNMP Tools:
Optionally you can include the SNMP WMI Provider option located under the SNMP Service. When ready click on the Next button.
This is the final screen – simply click on the Install button. Ensure the “Restart the destination server automatically if required” option is not selected:
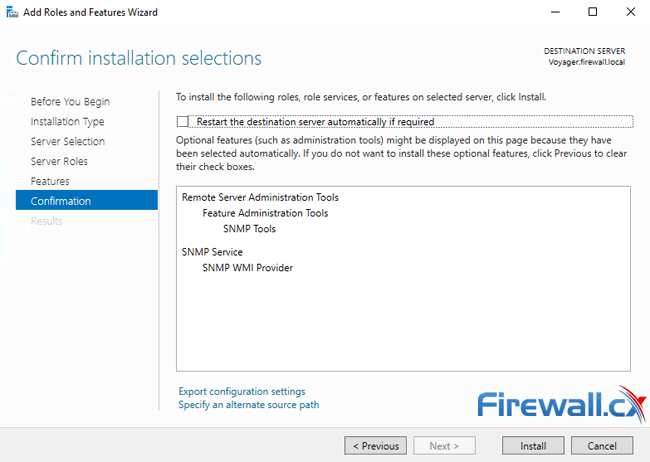
The SNMP Service will now be installed on your Windows 2016 Server. This process will require around 3 minutes to complete. When done, click on the Close button to exit the installation wizard: 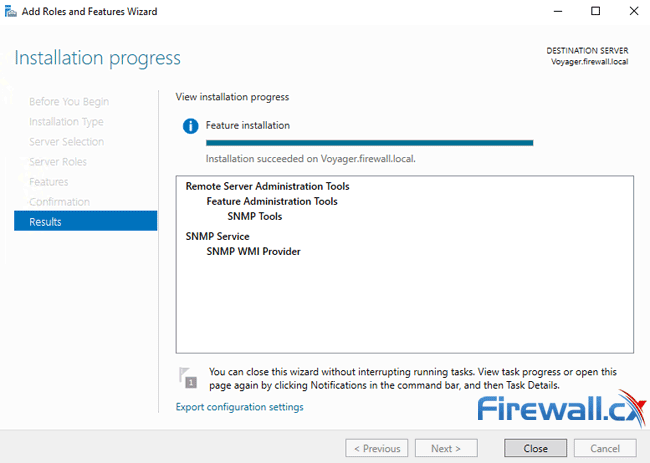
Step 2 – Configure SNMP Service & Read-Only or Read-Write Community String
Configuring the Windows 2016 Server SNMP Service is a simple task. As an administrator, run services.msc or open the Services console from the Administrative Tools. Double-click the SNMP Service and go to the Security tab:
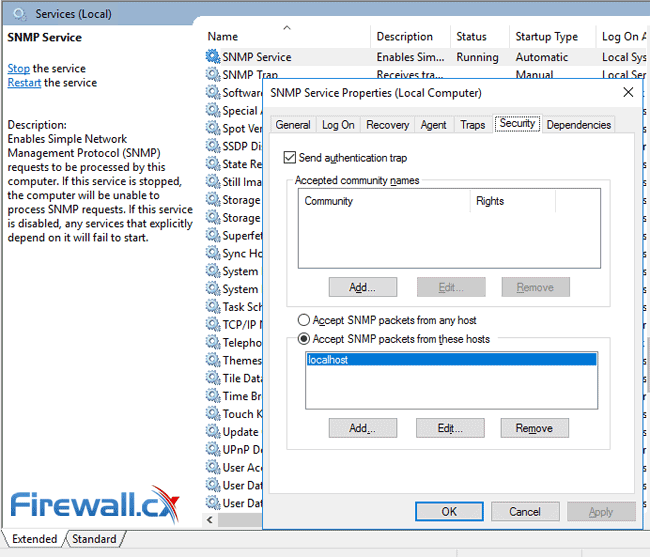
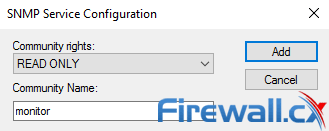
To add a Read-Only community string, click on the Add button under the Accepted community names. Enter the desirable Community Name and set the Community rights to READ ONLY. When done, click on the Add button:
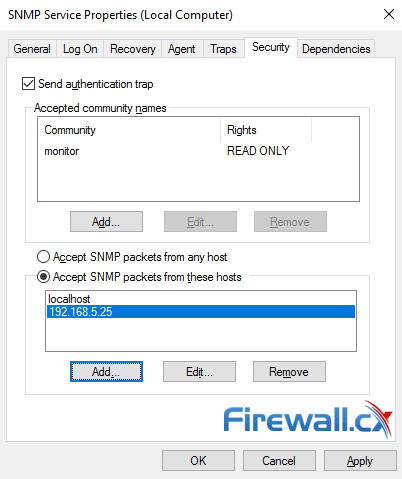
Next, in the lower section of the window, click on the Add button and insert the IP address which will be allowed to poll this server via SNMP. This would be the IP address of your Network Monitoring Service. In our environment our NMS is 192.168.5.25. When done, click on Apply then the OK button:
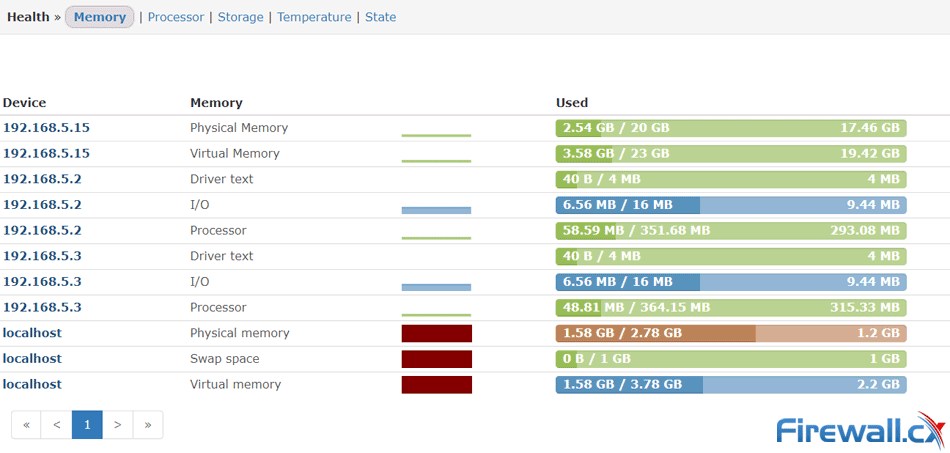
To confirm SNMP is working correctly, we configured our NMS to query and retrieve information from our server every 5 minutes. After a while we were able to see useful information populating our NMS:
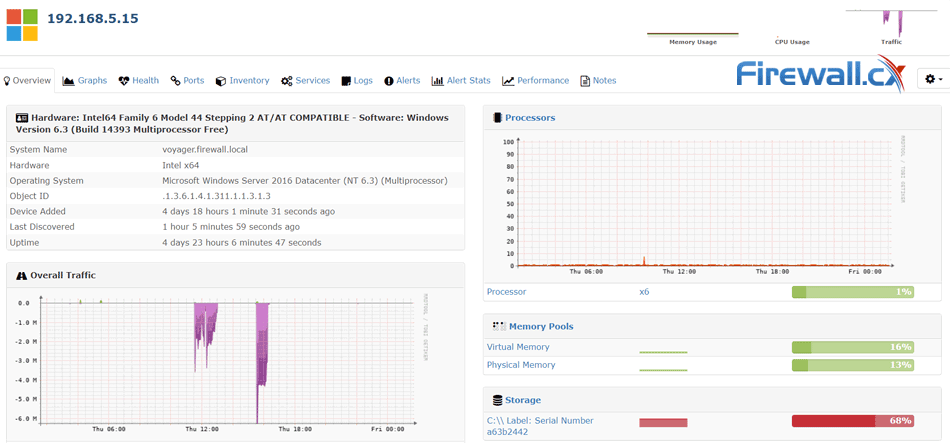
Depending on your Network Monitoring System you'll be able to obtain detailed information on your server's status and state of its resources:
Summary
This article briefly explained the purpose of SNMP and how it can be used to monitor network devices and collect useful information such as CPU, RAM and Disk usage, processes running, host uptime and much more. We also showed how to install and configure the SNMP Service for Windows Server 2016. For more technical Windows articles, please visit our Windows Server section.
Your IP address:
3.22.194.5
Wi-Fi Key Generator
Follow Firewall.cx
Cisco Password Crack
Decrypt Cisco Type-7 Passwords on the fly!


