How to Install and Configure Windows 2012 DNS Server Role
Our previous article covered introduction to the Domain Name System (DNS) and explained the importance of the DNS Server role within the network infrastructure, especially when Active Directory is involved. This article will cover the installation of the DNS server role in Windows 2012 Server and will include all necessary information for the successful deployment and configuration of the DNS service. Users interested can also read our DNS articles covering the Linux operating system or analysis of the DNS Protocol under our Network Protocols section.
The DNS Server can be installed during the deployment of Active Directory Services or as a stand-alone service on any Windows server. We'll be covering both options in this article.
FREE Hyper-V & VMware Virtualization Backup: FREE for Firewall.cx readers for a Limited Time! Download Now!
DNS Server Installation via Active Directory Services Deployment
Administrators who are in the process deploying Active Directory Services will be prompted to install the DNS server role during the AD installation process, as shown in the figure 1 below:
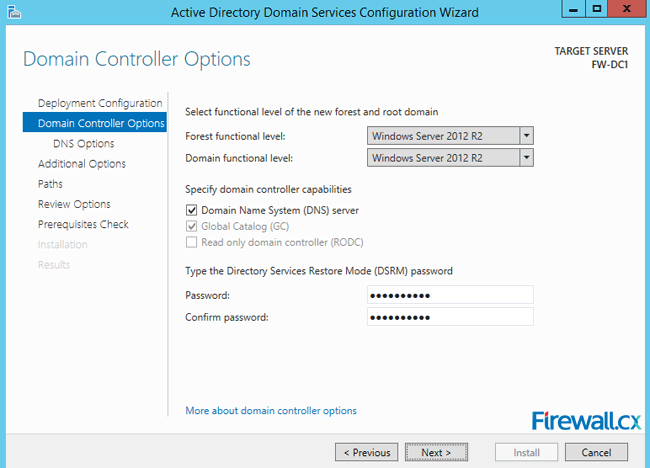 Figure 1. DNS Installation via Active Directory Services Deployment
Alternatively Administrators can select to install DNS server role later on or even on a different server, as shown next. We decided to install the DNS Server role on the Active Directory Domain Controller Server.
DNS Server Installation on Domain Controller or Stand Alone Server
To begin the installation, open Server Manger and click Add Roles and Features. Click Next on Before you begin page. Now choose Role-based or feature-based installation and click Next:
 Figure 2. Selecting Role-based or feature-based installation
In the next screen, choose the Select a server from this server pool option and select the server for which the DNS server role is intended. Once selected, click the Next button as shown in figure 3:
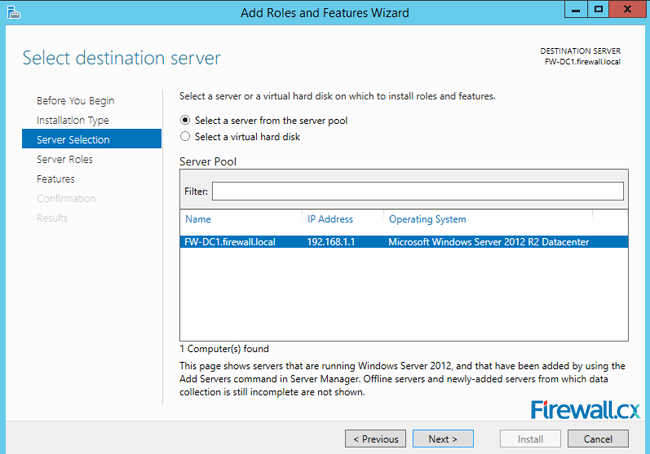 Figure 3. Selecting the Server that will host the DNS server role
The next screen allows us to choose the role(s) that will be installed. Select the DNS server role from the list and click Next to continue:
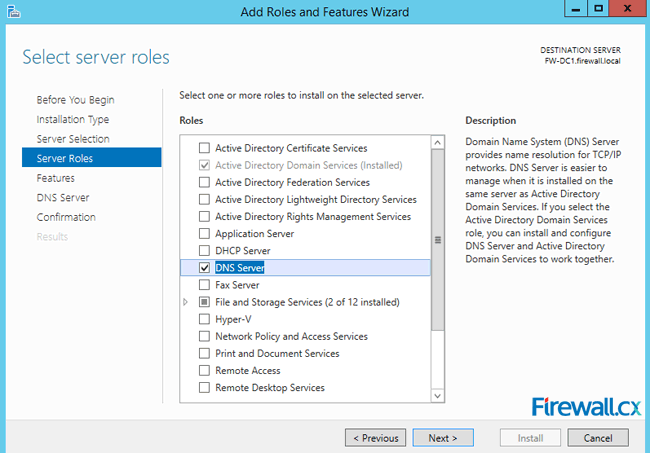 Figure 4. Selecting the DNS Server Role for installation
The next screen is the Features page, where you can safely click Next without selecting any feature from the list.
The next screen provides information on the DNS Server role that's about to be installed. Read the DNS Server information and click Next:
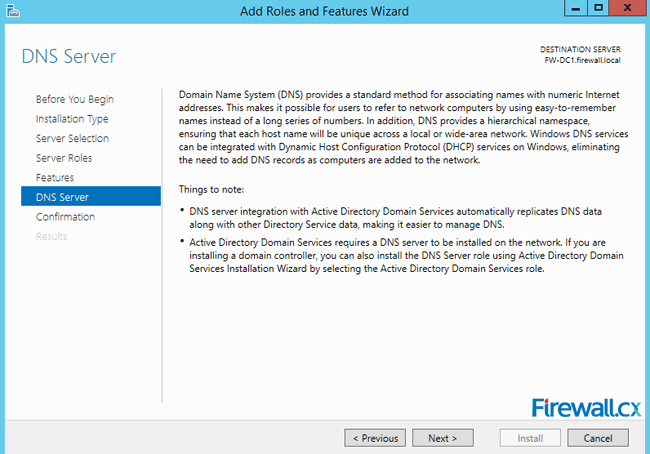 Figure 5. DNS Information
The final screen is a confirmation of roles and services to be installed. When ready, click on the Install button to for the installation to begin:
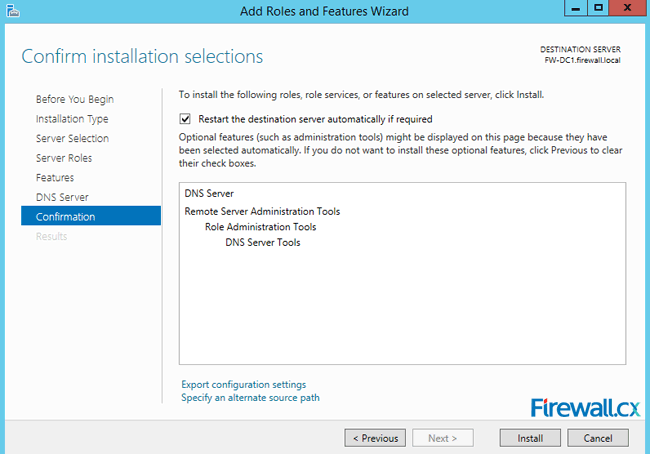 Figure 6. Confirm Installation Selections
The Wizard will provide an update on the installation progress as shown below. Once the installation has completed, click the Close button:
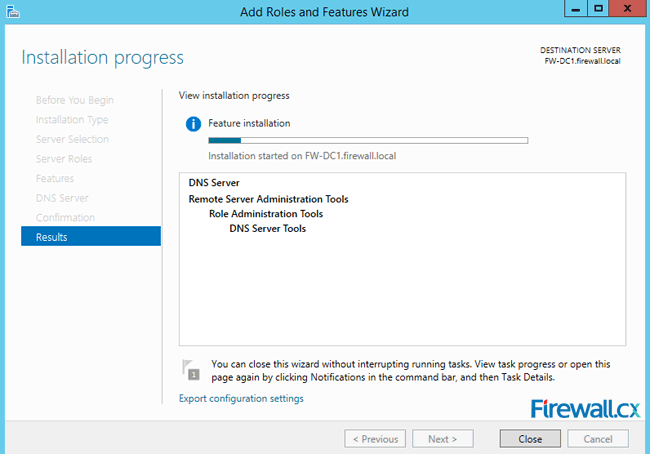 Figure 7. Installation Progress
FREE Hyper-V & VMware Virtualization Backup: FREE for Firewall.cx readers for a Limited Time! Download Now!
Configuring Properties of DNS Server
Upon the successful installation of the DNS server role, you can open the DNS Manager to configure the DNS Server. Once DNS Manager is open, expand the server, in our example the server is FW-DC1. Right below the server we can see the Forward Lookup Zones and Reverse Lookup Zones listed. Because this is an Active Directory Integrated DNS server there is a firewall.local and _msdcs.firewall.local zone installed by default, as shown in figure 8:
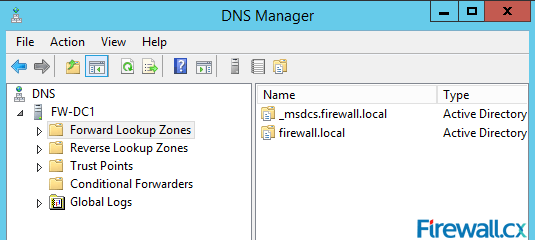 Figure 8. DNS Manager & DNS Zones
To configure the DNS server properties, right-click the DNS server and click properties. Next, select the Forwarders tab. Click Edit and add the IP address of DNS server that this server will query if it is unable to resolve the IP address of the listed domains. This is usually the ISP's DNS server or any public DNS server such as Google (e.g 8.8.8.8, 4.2.2.2). There is another feature called root hints which also does similar job (queries the Root DNS servers of the Internet) but we prefer using forwarders alongside with public DNS servers:
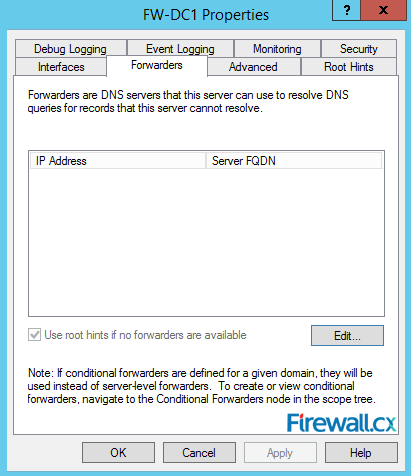 Figure 9. DNS Forwarders – Add your ISP or Public DNS Servers here
Next, click on the Advanced tab. Here you can configure advanced features such as round robin (in case of multiple DNS servers), scavenging period and so on. Scavenging is a feature often used as it deletes the stale or inactive DNS records after the configured period, set to 7 days in our example:
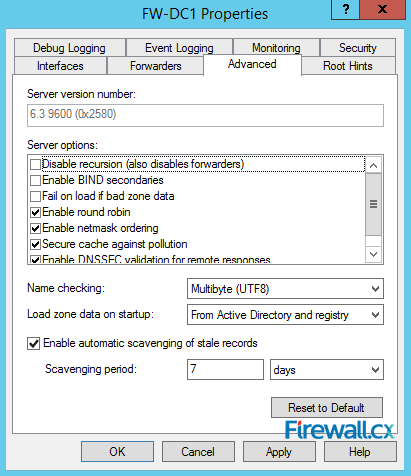 Figure 10. Advanced Options - Scavenging
Next up is the Root Hints tab. Here, you will see list of 13 Root Servers. These servers are used when our DNS server is unable to resolve DNS requests for its clients. The Root Servers are used when no DNS Forwarding is configured. As we can see, DNS forwarding is pretty much an optional but recommended configuration. It is highly unlikely administrators will ever need to change the Root Hints servers:
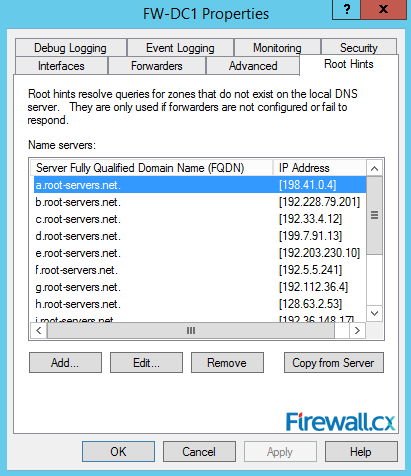 Figure 11. Root Hints
Our next tab, Monitoring is also worth exploring. Here you can perform the DNS lookup test that will run queries against your newly installed DNS server. You can also configure automated test that will run at a configured time interval to ensure the DNS server is operating correctly:
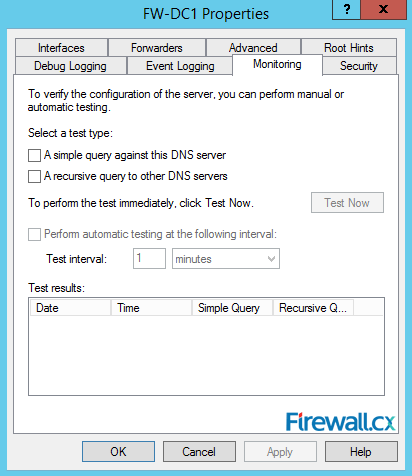 Figure 12. Monitoring Tab – Configuring Automated DNS Test Queries
Next, click on the Event Logging tab. Here you can configure options to log DNS events. By default, all events are logged. So you can configure to log only errors, warnings, combination of errors & warnings, or turn off logging (No events option):
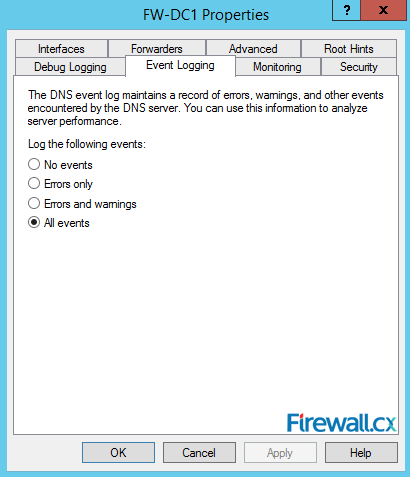 Figure 13. Event Logging
When Event Logging is enabled, you can view any type of logged events in the Event Viewer (Administrative Tools) console.
The Debug Logging tab is next up. Debug Logging allows us to capture to a log file any packets sent and received by the DNS server. Think of it as Wireshark for your DNS server. You can log DNS packets and filter them by direction, protocols, IP addresses, and other parameters as shown below. You can setup the log file location and set the maximum file size in bytes:
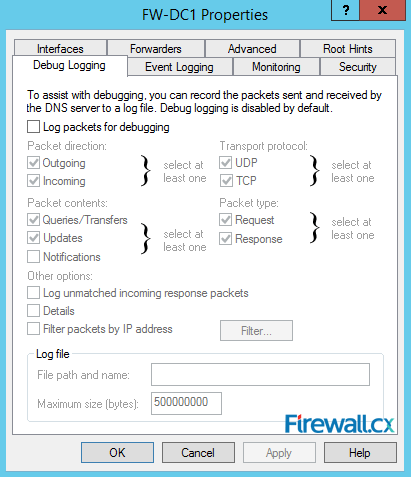 Figure 14. Debug Logging – Capturing DNS Packets & Configuring DNS Debugging
Zone – Domain Properties
Each Zone or Domain has a specific set of properties which can be configured as shown in figure 15 below. In our example, firewall.local is an Active Directory-integrated zone as indicated by the Type field. Furthermore the zone's status is shown at the top area of the window – our zone is currently in the running state and can be paused by simply clicking on the pause button on the right:
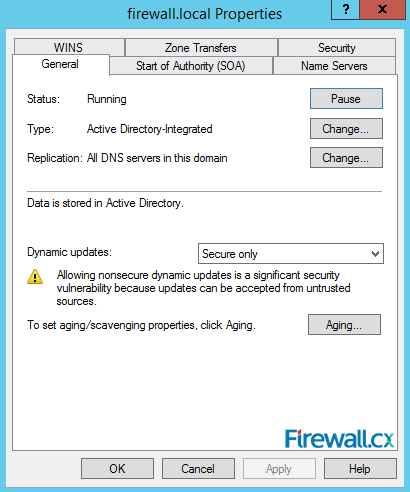 Figure 15. Zone Properties
Right below, you can change the zone type to primary, secondary or stub. You can also setup dynamic updates to be secure or not. Similarly, you can setup aging or scavenging properties to automate the cleanup of stale records.
The Start of Authority (SOA) tab provides access to a number of important settings for our DNS server. Here, you can configure the serial number increments automatically every time there is a change in the DNS zone. The serial number is used by other DNS servers to identify if any changes have been made since the last time they replicated the zone. The Primary server field indicates which server is primary server where the zone or domain is hosted. In case there are multiple DNS servers in the network, we can easily select a different server from here:
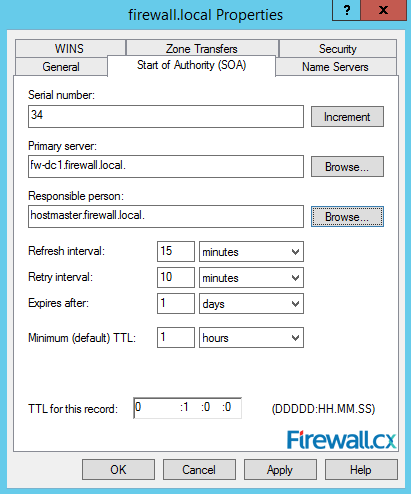 Figure 16. Start Of Authority Settings
In addition, you can also configure the TTL (Time to Live) value, refresh, retry intervals and expiry time of the record.
Next is the Name Servers tab. In this tab, you can add list of name servers where this zone can be hosted:
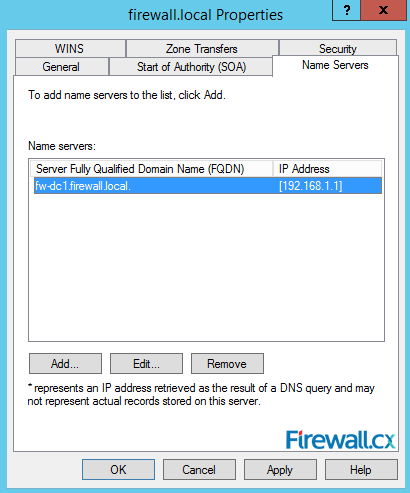 Figure 17. DNS Name Servers
Finally, the Zone Transfers tab. In this tab, you can add DNS servers which can copy zone information (zone transfer) from this DNS server:
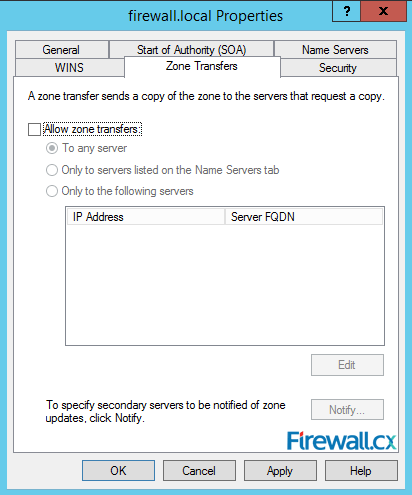 Figure 18. Zone Transfers
Once all configuration changes have been completed, click Apply and your zone is good to go.
FREE Hyper-V & VMware Virtualization Backup: FREE for Firewall.cx readers for a Limited Time! Download Now!
This article showed how to install and configure Windows 2012 DNS Server Role and explained all DNS Server options available for configuration.
Your IP address:
18.222.24.23
Wi-Fi Key Generator
Follow Firewall.cx
Cisco Password Crack
Decrypt Cisco Type-7 Passwords on the fly!


