How to Enable or Disable SSH on VMware ESXi via Web GUI, vSphere Web GUI (vCenter), vSphere Client and Shell Console
SSH access to VMware’s ESXi server is by disabled by default however there are many reasons where SSH might be required. VMware and System administrators often find the need to perform advanced administrative tasks that require SSH access to the ESXi host. For example, deleting or reloading a VM with an Invalid Status can only be performed via SSH.
In this article, we’ll show you how to enable SSH on your ESXi host with just a few simple steps. This task can be achieved via the ESXi Web GUI, vSphere Web GUI (vCenter) vSphere client or ESXi console. We’ll cover all three methods.
Execution Time: 5 minutes
- Enabling and Disabling SSH on VMware ESXi via Web GUI
- Enabling and Disabling SSH on VMware via vSphere Web GUI Client (vCenter)
- Enabling and Disabling SSH on VMware ESXi via vSphere Client
- Enabling and Disabling SSH on VMware ESXi via ESXi Console
- Summary
Security Tip: If your ESXi host management IP is not protected or isolated from the rest of the network, it is advisable to enable SSH on an as-needed basis.
Enabling and Disabling SSH Console on VMware ESXi via Web GUI
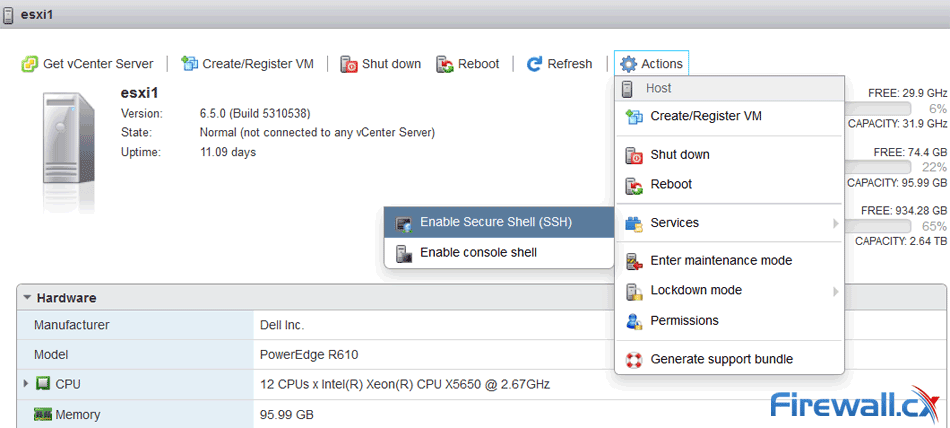
Log into your ESXi server and select the host from the Navigator window. Next, go to Action > Services and select the Enable Secure Shell (SSH) menu option:
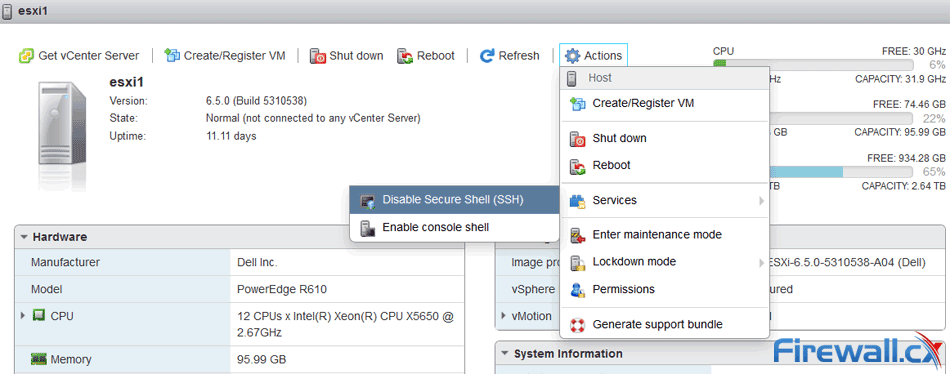
This will immediately enable SSH. To disable SSH, repeat the same steps. You’ll notice that the Disable Secure Shell (SSH) option is now available:
Enabling and Disabling SSH on VMware via vSphere Web GUI Client (vCenter)
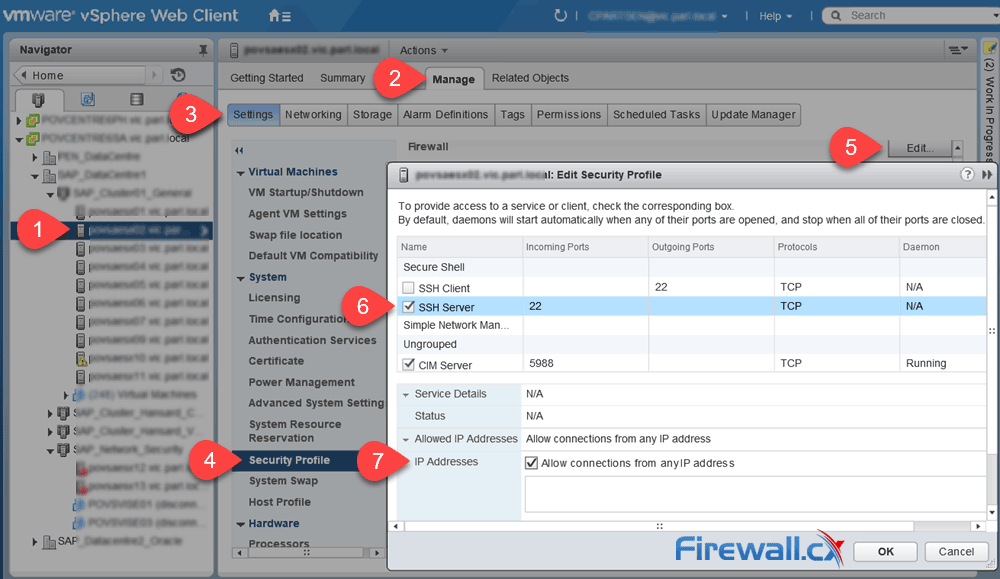
For those with a VMware vCenter environment, you can enable SSH for each ESXi host by selecting the host and then going to Manage > Settings > Security Profile > Edit. In the pop-up window, scroll down to SSH Server and tick it. Optionally enter the IP address or network(s) you require to have SSH access to the host:
Enabling and Disabling SSH on VMware ESXi via vSphere Client
Launch your vSphere client and log into your ESXi host. From vSphere, click on the ESXi host (1), then select the Configuration tab (2). From there, click on the Security Profile (3) under the Software section. Finally click on Properties:
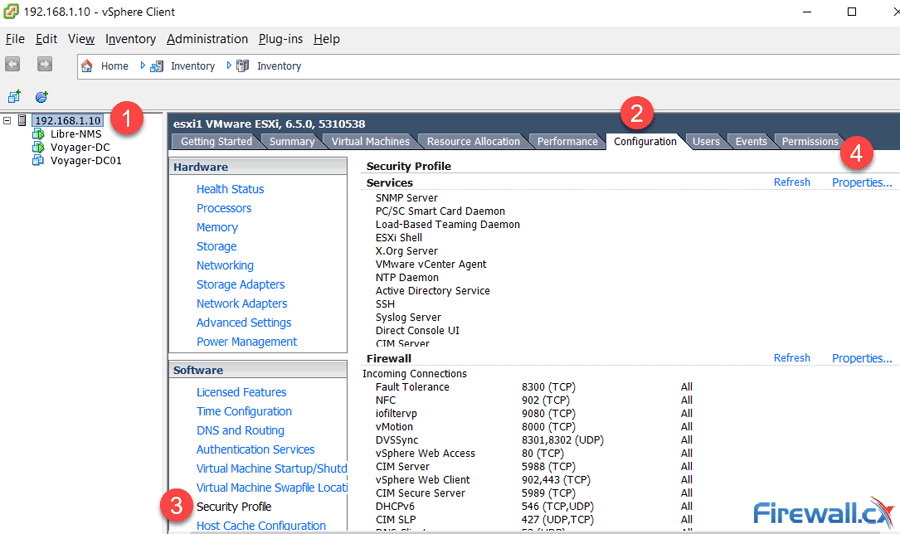
On the pop-up window, select SSH and click on the Options button: 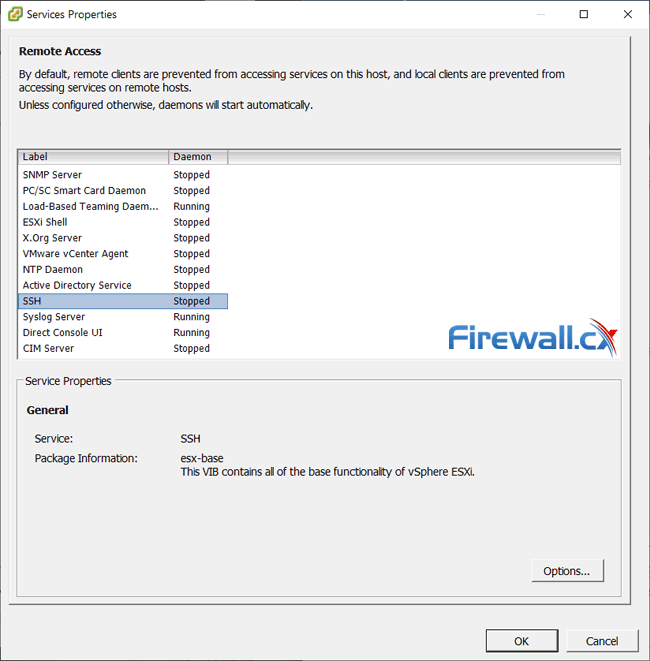
Select the required Startup Policy. Note that the ‘Start and stop with host’ option will permanently enable SSH. Next, click on the Start button under Service Commands to enable SSH immediately. When done, click on the OK button:
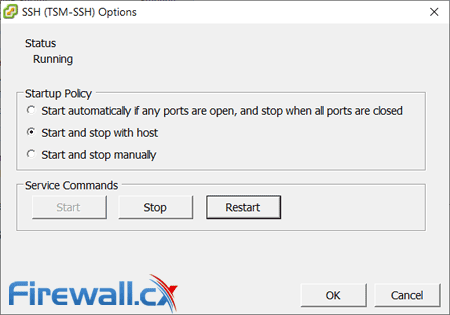
To disable the SSH service via vSphere, follow the same process as above and ensure you select the “Start and stop manually” Startup Policy option and click on the Stop button under the Service Commands section.
Enabling and Disabling SSH Console on VMware ESXi via ESXi Console
From your ESXi console, hit F2 to customise the system:
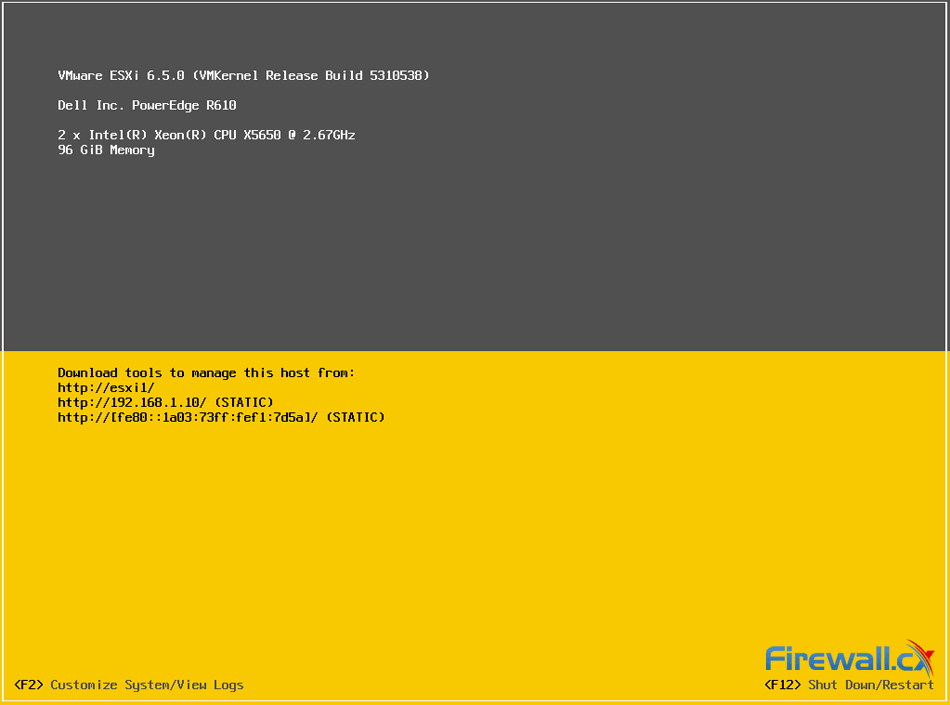
At the prompt, enter the ESXi root user credentials:
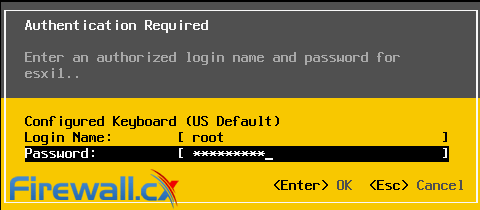
At the next window, highlight Troubleshooting Options and hit Enter:
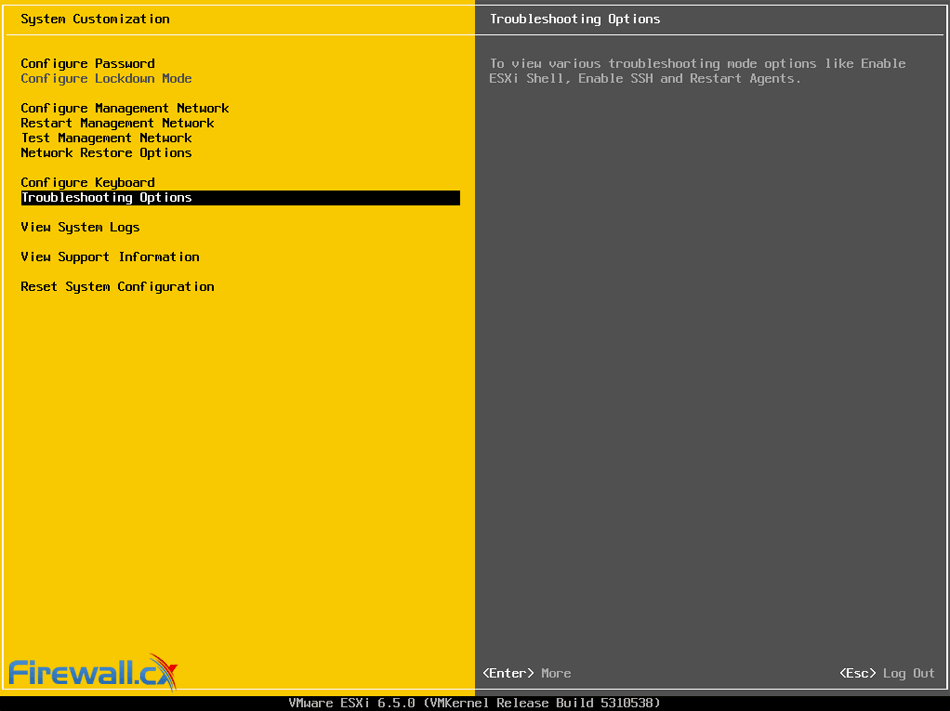
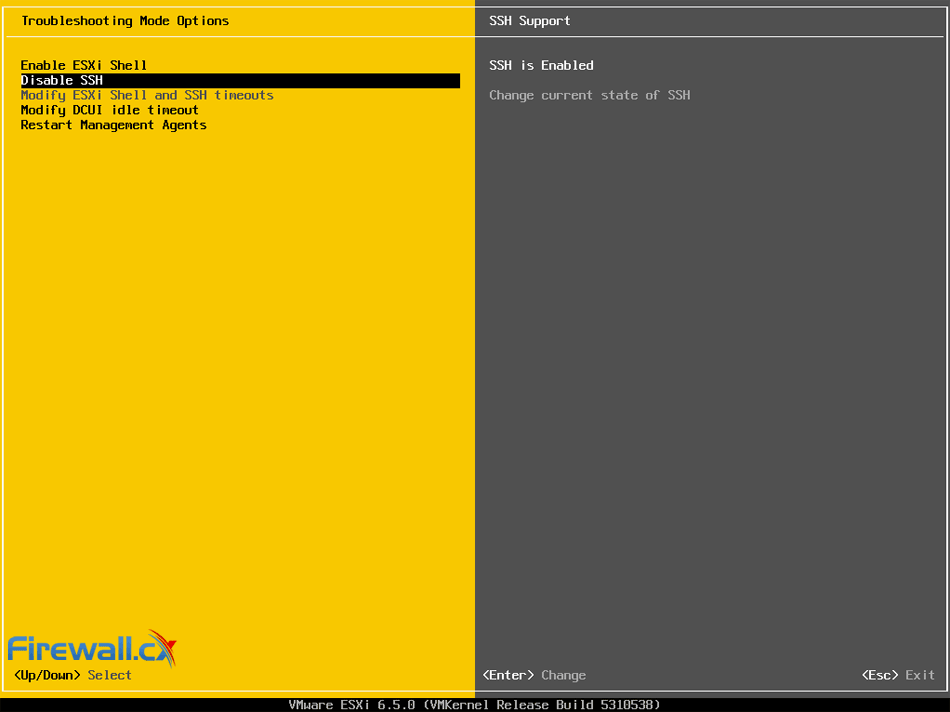
Next, go down to the Enable SSH option and hit Enter to enable SSH: 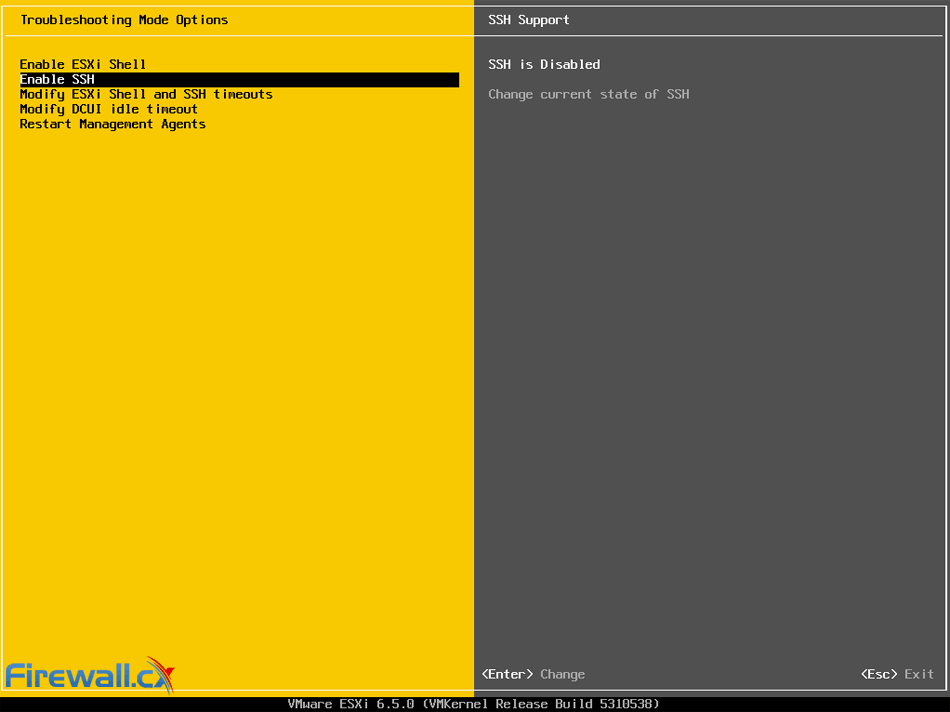
Notice that ESXi is now reporting that SSH is enabled:
Now hit Esc to exit the menu and logout from the ESXi host console.
Summary
In this article we showed how to enable and disable the SSH service on a VMware ESXi host using the Web GUI, vSphere client and ESXi Console. We explained why the SSH service is sometimes required to be enabled and also noted the security risks in permanently enabling SSH.
Your IP address:
3.22.130.44
Wi-Fi Key Generator
Follow Firewall.cx
Cisco Password Crack
Decrypt Cisco Type-7 Passwords on the fly!


