How to Install/Enable Telnet Client for Windows Server 2012 via GUI, Command Prompt and PowerShell
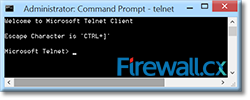 IT professionals frequently need connectivity and management tools. The Telnet Client is one of the most basic tools for such activities. Using this tool, you can connect to a remote Telnet server and run applications on it. This is also a very useful tool for testing the connectivity to remote servers, such as those running SMTP services, web services and so on. In this article we will discuss how to install or enable Telnet client for Windows Server 2012, using the GUI interface or command prompt.
Microsoft operating systems since Windows NT have included the Telnet client as a feature. However, later Operating Systems beginning with the Windows Server 2008 and Windows Vista prefer not to enable it by default. Although you can always use a third-party tool for assisting you in remote connections and for troubleshooting connectivity, you can enable the Telnet client on your Windows Server 2012 any time needed.
Backup your Windows Server 2012 R2 host using Altaro’s Free Hyper-V & VMware Backup solution. Download Now!
Primarily, there are three ways you can install or enable the Telnet client for Windows Server 2012. You can install the Telnet client from the Graphical User Interface, Windows command prompt or from PowerShell. We will discuss all the methods in this article.
Installing Telnet Client From The GUI
Invoke the Server Manager by clicking on the second icon on the bottom taskbar on the desktop of the Windows Server 2012 R2:

Figure 1. Launching Windows Server Dashboard
On the Dashboard, click on Add Roles and Features, which opens the Add roles and features wizard:
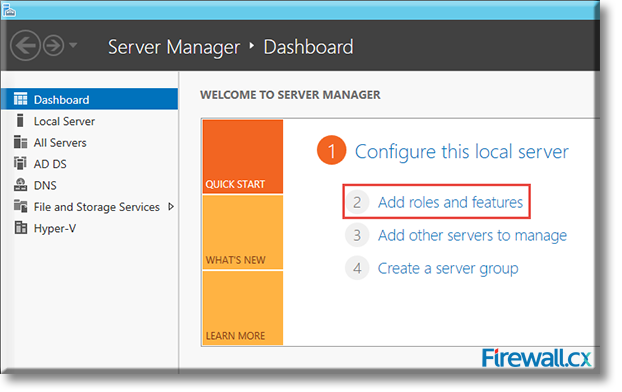
Figure 2. Selecting Add roles and features on Windows Server 2012
Click on Installation Type and select Role Based or Feature Based Installation. Click on Next to proceed:
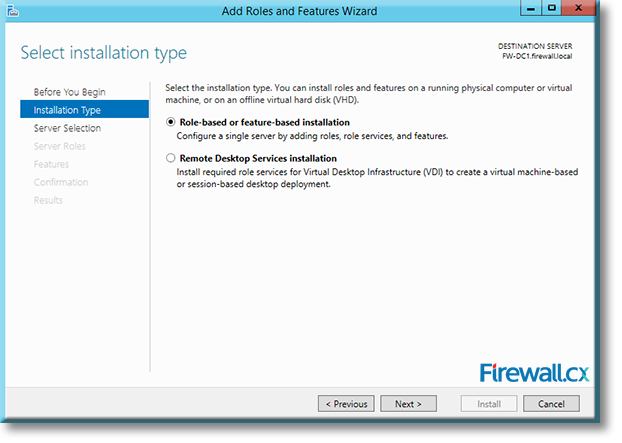
Figure 3. Selecting Installation Type – Role-based or feature-based installation
On the next screen, you can Select a server from the server pool. We select the server FW-DC1.firewall.local:
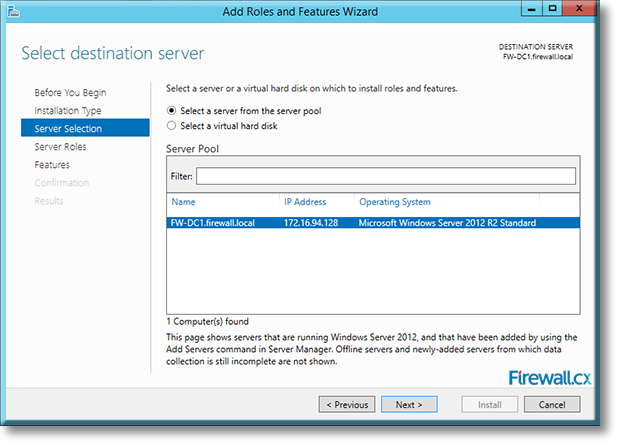
Figure 4. Selecting our server, DC1.firewall.local
Clicking on Next brings you to the Server Roles screen. As there is nothing to be done here, click on Next to continue to the Features screen. Now Scroll down under the Features until you arrive at the Telnet Client. Click within the box in front of the entry Telnet Client to select it, then click on Next to continue:
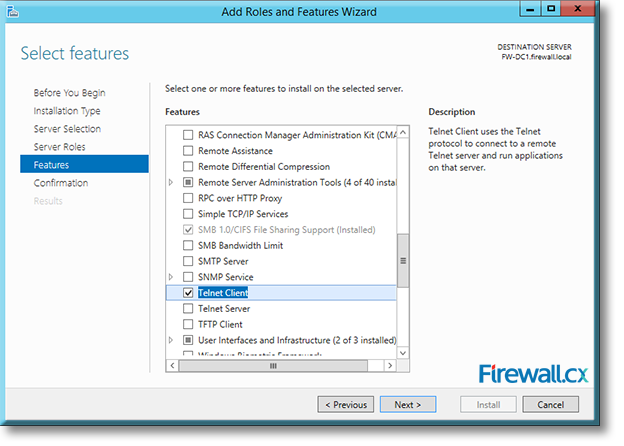
Figure 5. Selecting the Telnet client for installation
The following screen asks you to Confirm Installation Selections. Click the Restart the destination server automatically if required tick box and click on Yes to confirm the automatic restart without notifications. Finally, click on Install to start the installation of the Telnet Client:
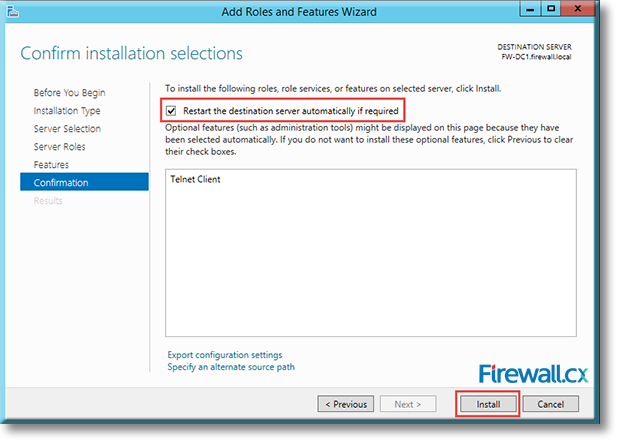
Figure 6. Final confirmation and initiation of the Windows Telnet Client installation
Once completed, the Results screen will inform the success or failure of the process:
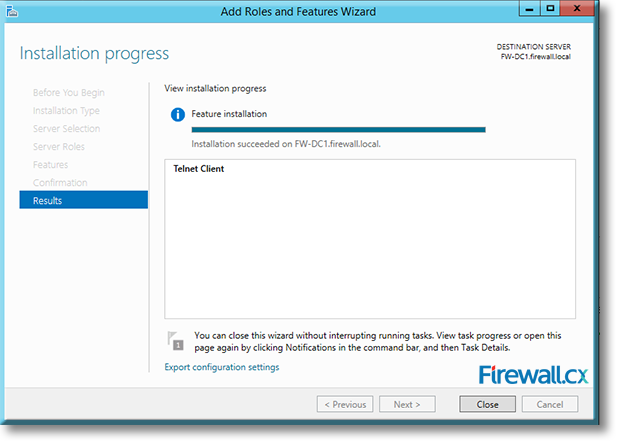
Figure 7. Successful installation of Windows Server Telnet Client
Click on Close to end the installation and return to the Server Manager screen.
Running a Windows Hyper-V or VMware server? Hyper-V & VMware backup made easy with Altaro’s Free VM Backup solution. Download Now!
Installing Telnet Client From The Command Prompt
You need to invoke the Command Prompt window as an Administrator. For this, right click on the Windows Start icon located on the lower left corner on the desktop taskbar, then Click on Command Prompt (Admin) and click on Yes to the User Account Control query that opens up.
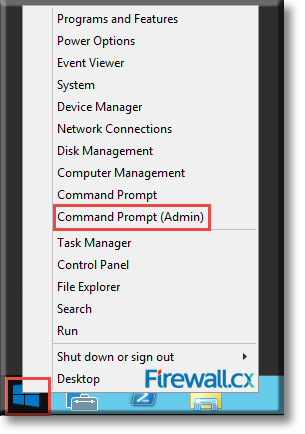
Figure 8. Launching a Command Prompt with Administrator privileges
Once the Administrator: Command Prompt window opens, type the following command and press Enter:
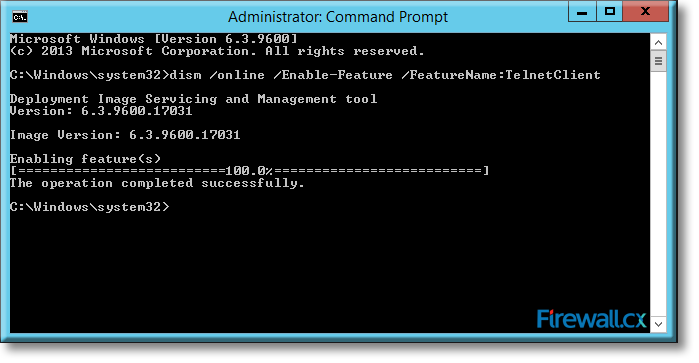
Figure 9. Installing Telnet Client via Elevated Command Prompt
The command prompt will provide a real-time update within the command prompt window and inform you once the Telnet Client has been successfully installed.
To exit the command prompt window, simply click on the X button (top right corner) or type Exit and press Enter.
Note: It is possible to also install Windows Telnet Client on Windows 8 & Windows 8.1 using the same commands at the Command Line Prompt or PowerShell interface.
Installing Telnet Client From PowerShell
You need to invoke the PowerShell with elevated permissions, i.e., run as Administrator. For this, right click on the third icon from the left on the bottom taskbar on the desktop of the Windows Server 2012 R2:
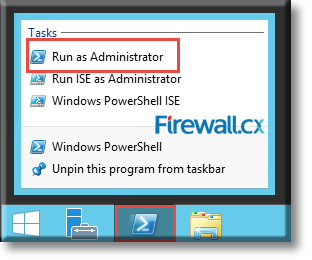
Figure 10. Running PowerShell with Administrator privileges
Click on Run as Administrator and click on Yes to the User Account Control query that opens up.
Within the PowerShell window, type the following two commands, pressing Enter after each one:
PS C:\Windows\system32> Add-WindowsFeature telnet-client

Figure 11. Installing Telnet Client via PowerShell On Windows 2012 R2 Server
Windows PowerShell will commence installing Telnet Client and will inform you if the Telnet Client has been successfully installed and whether the server needs a restart.
Type Exit and press Enter to close the Windows PowerShell window.
This article showed how to install the Telnet Client on Windows Server 2012 R2 using the Windows GUI Interface, Elevated Command prompt and Windows PowerShell. For more exciting articles on Windows 2012 R2 server, visit our Windows 2012 Section.
Wi-Fi Key Generator
Follow Firewall.cx
Cisco Password Crack
Decrypt Cisco Type-7 Passwords on the fly!


