Cisco SmartCare Update - Next Generation Appliance
It's been more than a year since we introduced the Cisco SmartCare service and appliance. It's been extremely popular and has successfully penetrated the Cisco market with installations continually increasing.
Since the presentation of the new SmartCare service on Firewall.cx some things have changed, which is the reason we decided to write an update on the original article.
Firstly, the Cisco SmartCare appliance has changed. With the termination of collaboration between Cisco and HP, Cisco no longer supplies HP-based SmartCare appliances; these have been replaced by IBM-based servers, which are a lot shorter and lighter. The SmartCare appliance is much easier to install and doesn't require a lengthy rack to fit in properly.
While the operating system is still Linux, the distribution used now is the popular CentOS v5.3 with kernel version 2.6.18-128.el5 - essentially a repackaged RedHat Enterprise Linux. This operating system runs on 3.5 Gigs of installed memory and an Intel-based CPU. The hard drive is a Seagate Barracuda SATA 250GB spinning at 7200rpm.
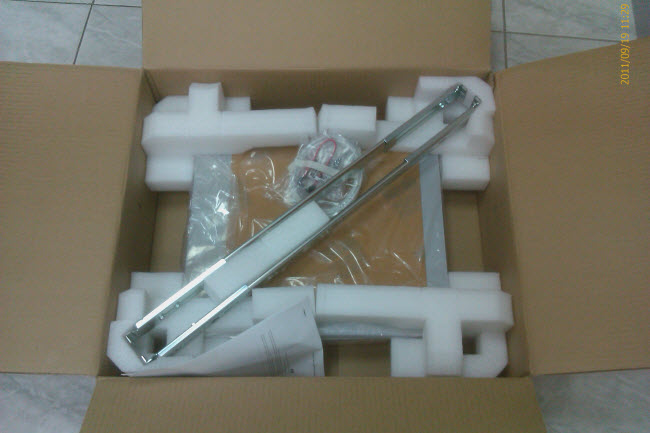
As expected, the box the appliance arrives in is very small compared to the original SmartCare appliance. The box is similar to that of a Cisco 2960G Catalyst switch and contains mounting brackets plus a SATA cable and a few screws which we couldn't find a use for!

Full setup instructions are provided by Cisco. The Installation sheet can be seen in the lower left corner of the pictured appliance.
Below, the front panel of the appliance is very simple with only one button for power (red button). There still is no CD/DVD installed:

In the middle of the panel you can easily identify the system's internal hard disk drive.
Looking at the right side of the appliance, notice a series of leds, a reset switch and the power button:

The leds provide visual indication of the system's activities. Here's what they show, from left to right:
Hard Drive, LAN1, LAN2, Power led, Reset Button and Power switch,
Moving to the left side of the appliance, we see the new 'Cisco' logo and, right below, two USB ports which most probably you will never use:

On the rear of the appliance you'll find all necessary connectors to hook it up to your systems, nothing special here, however, we should note that both network cards are enabled and can be configured. Since this is a Linux-based system, the first network interface is identified as 'eth0' (left side) while the second is labelled 'eth1' (right side):

The serial cable provided connects directly to the serial port, left of the blue VGA port and requires the following settings configured:
Configuring and installing the next generation Cisco SmartCare appliance is pretty much the same as the previous one except for the update procedure. This has been simplified and only requires the Cisco SmartCare partner CCO account so it can access Cisco's database and update to the latest available version. If you have a DHCP server installed in your network the appliance will automatically configure itself and will only require your CCO credentials.
Below is the appliance update procedure where you can see that the information required is simple. When the appliance requests the URL to download the software updates, you simply hit 'enter' (notice below there is no URL) without entering any information:
===============================================================================
Client Update
===============================================================================
URL :
Username : cpartsenidis
Password : *********************
Sending request for the list of available updates...
Downloading image for version 1.9.14.0...
% Total % Received % Xferd Average Speed Time Time Time Current
Dload Upload Total Spent Left Speed
76 29.6M 76 22.6M 0 0 734k 0 0:00:41 0:00:31 0:00:10 793k
Latest version downloaded successfully.
Installation might take 5-10 minutes.
After installation the client will be rebooted and you may have to reconnect the session.
Are you sure you want to continue with the installation (Y/N)?: Y
When the appliance reboots, the connection to the host is closed.
Any console sessions and remote client sessions that you are using will also be closed.
You can verify that the upgrade was successful by using the 'show ver' command.
You can also confirm the version of the appliance in Smart Care.
To do so, from the navigation pane, click 'Assessment Appliance'.
Please do not press CTRL+C during upgrade process.
Beginning Installation * * * * * * * * * * * * * * * * * * * * * *
Installation Complete
Removing temporary files...
Broadcast message from root (ttyS0) (Mon Sep 19 12:14:35 2011):
The system is going down for reboot NOW!
INIT: Sending processes the TERM signal
Session terminated, killing shell...Terminated
The rest of the installation procedure remains the same and has been thoroughly covered in our original SmartCare article.
Below is a screenshot with the appliance installed in our customer's rack. Notice how bright the blue power led shines:

Closing, it seems that Cisco is slowly moving away from the SmartCare appliance and is now offering a software-based client that can be installed on your network servers. This is an alternative to the appliance, however, we haven't had the chance to review it yet. Once we get our hands on the SmartCare client based application, be sure to expect a detailed review!
Your IP address:
18.116.42.179
Wi-Fi Key Generator
Follow Firewall.cx
Cisco Password Crack
Decrypt Cisco Type-7 Passwords on the fly!


