Benefits of Deploying GFI LanGuard Agents on Workstations & Servers. Automate Network-wide Agent Scanning & Deployment
 GFI LanGuard Agents are designed to be deployed on local (network) or remote servers and workstations. Once installed, the GFI LanGuard Agents can then be configured via LanGuard’s main server console, giving the administrator full control as to when the Agents will scan the host they are installed on, and communicate their status to the GFI LanGuard server.
Those concerned about system resources will be pleased to know that the GFI LanGuard Agent does not consume any CPU cycles or resources while idle. During the time of scanning, once a day for a few minutes, the scan process is kept at a low priority to ensure that it does not interfere or impact the host’s performance.
GFI LanGuard Agents communicate with the GFI LanGuard server using TCP port 1070, however this can be configured.
Let’s see how we can install the GFI LanGuard Agent from the server’s console.
First open GFI LanGuard and select Agents Management from the Configuration tab:
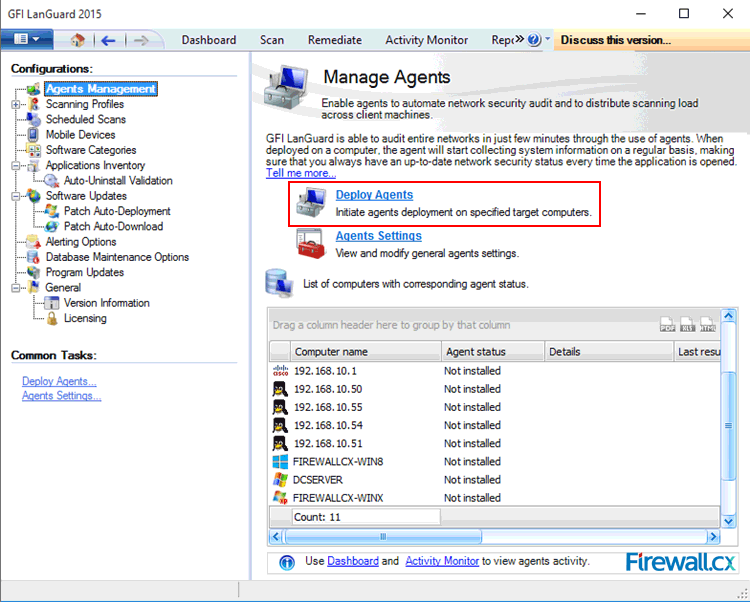
Figure 1. Select Agents Management and the Deploy Agents
Next, you can choose between Local domain or Custom to define your target(s):
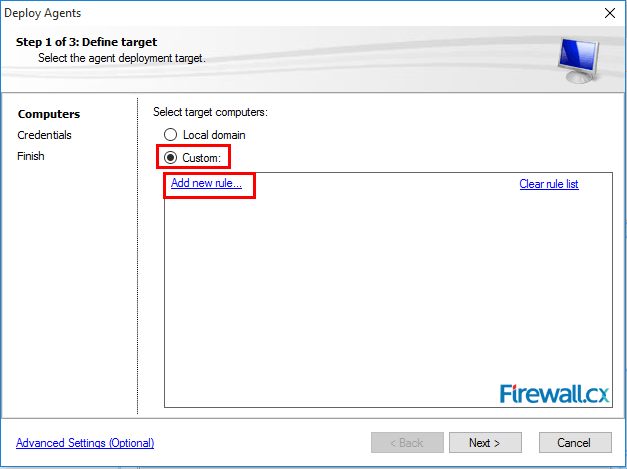
Figure 2. Defining Target rules for GFI LanGuard Agent deployment
Since we’ve selected Custom, we need to click on Add new rule to add our targets.
The targets can be defined via their Computer name (shown below), Domain name or Organization Unit:
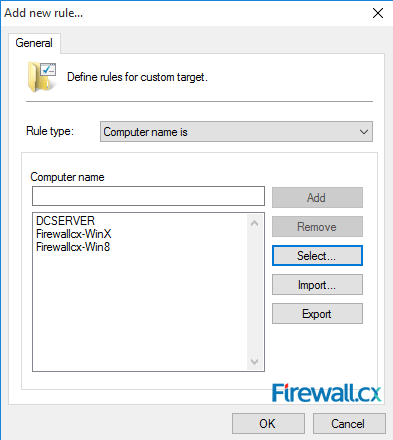
Figure 3. Defining our target hosts using their Computer name
When complete, click on OK to return to the previous window.
We now see all computer hosts selected:
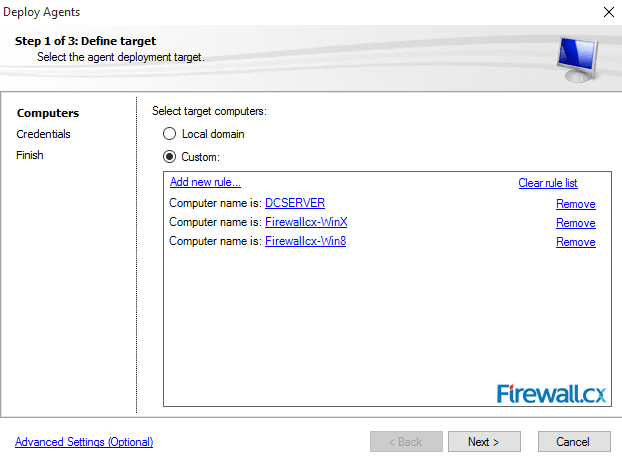
Figure 4. Viewing selected hosts for Agent deployment
The Advance Settings option on the lower left area of the window, allows us to configure the automatic discovery of machines with Agents installed, setup up the Audit schedule of the agent (when it will scan its host and update the LanGuard server), Scan profile used by the Agent, plus an extremely handy feature called Auto Remediation which enables GFI LanGuard to automatically download and install missing updates, service packs, uninstall unauthorized applications and more, on the remote computers.
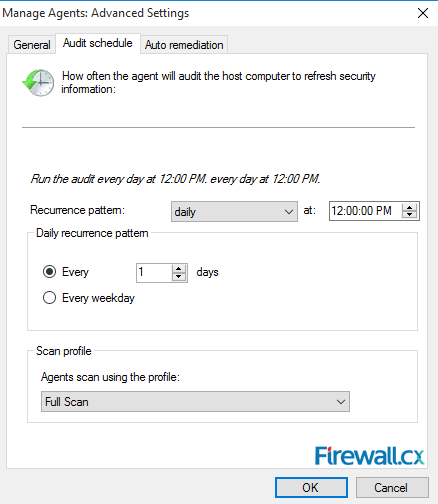
Figure 5. GFI LanGuard - Agent Advanced Settings – Audit Schedule tab
The screenshot below shows us the Auto Remediation tab settings:
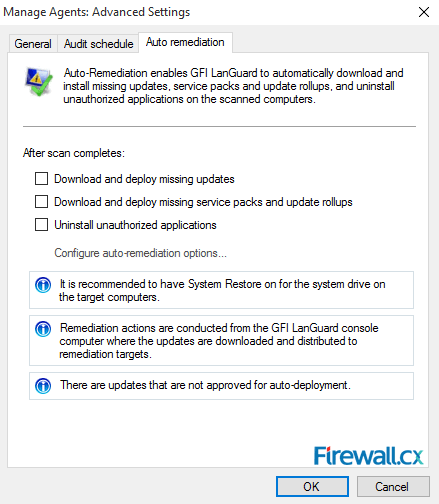
Figure 6. Agent Advanced Settings – Auto Remediation tab
When done, click on OK to save the selected settings and return back to the previous window.
Now click on Next to move to the next step. At this point, we need to enter the administrator credentials of the remote machine(s) so that GFI LanGuard can log into the remote machines and deploy the agent. Enter the username and password and hit Next and then Finish at the last window:
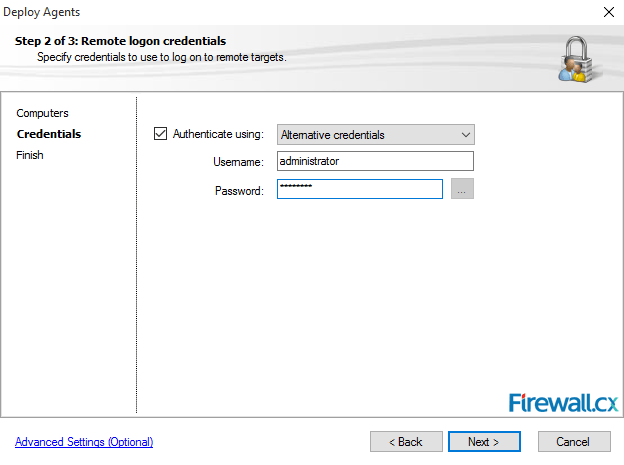
Figure 7. Entering the necessary credentials for the Agent deployment
GFI LanGuard will now being the deployment of its Agent to the selected remote hosts:
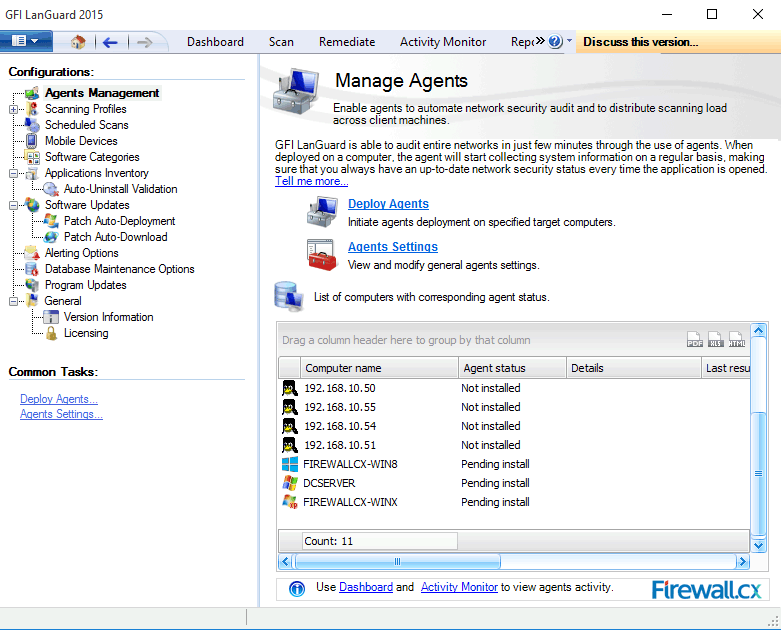
Figure 8. GFI LanGuard preparing for the Agent deployment
After a while, the LanGuard Agent will report its installation status. Where successfully, we will see the Installed message, otherwise a Pending install message will continue to be displayed along with an error if it was unsuccessful:
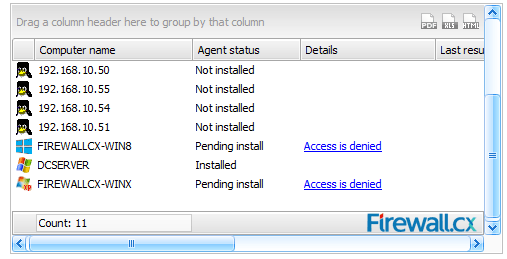
Figure 9. LanGuard Agent installation status
Common problems not allowing the successful Agent deployment are incorrect credentials, Firewall or user rights.
To check the status of the installed Agent, we can simply select the desired host, right-click and select Agent Diagnostic as shown below:
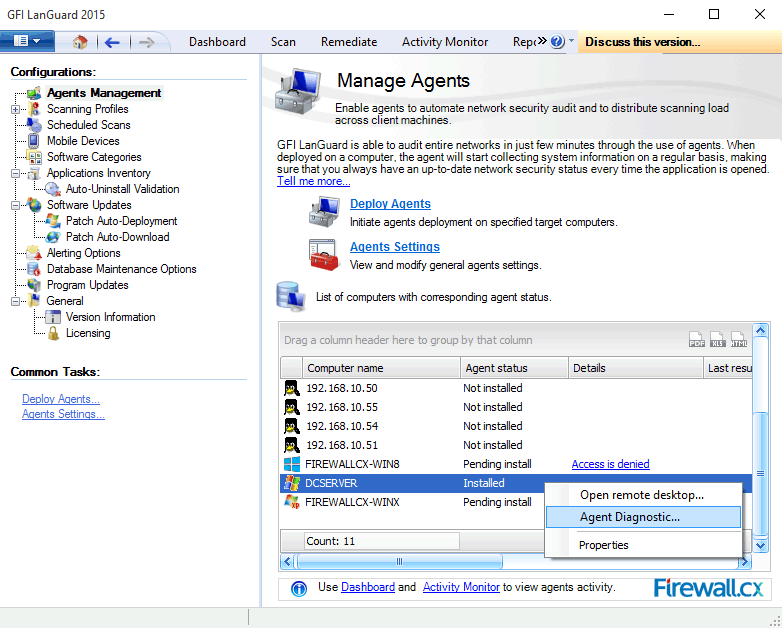
Figure 10. Accessing GFI LanGuard Agent Diagnostics
The Agent Diagnostic window is an extremely helpful feature as it provides a great amount of information on the Agent and the remote host. In addition, at the end of the Diagnosis Activity Window, we’ll find a zip file that contains all the presented information. This file can use email to GFI’s support in case of Agent problems:
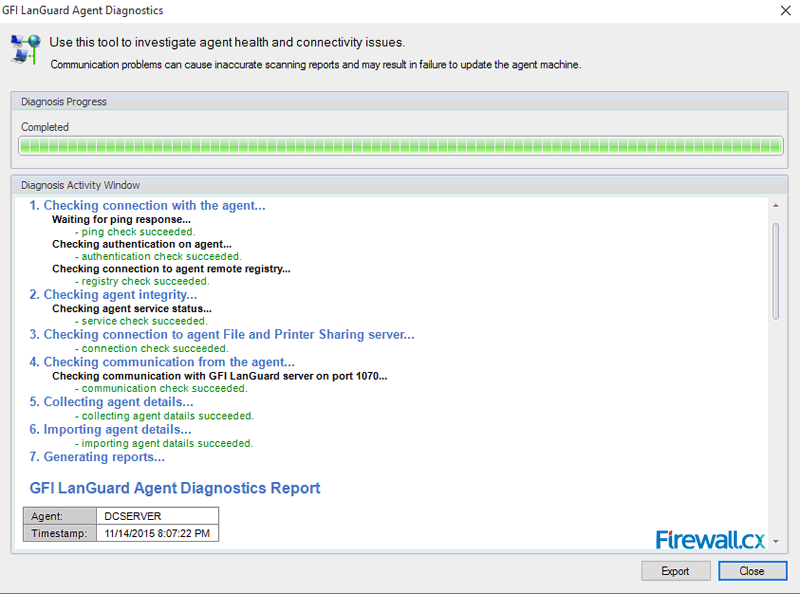
Figure 11. Running the Agent Diagnostics report
The GFI LanGuard Agent is an extremely useful feature that allows the automatic monitoring, patching and updating of the host machine, leaving IT Administrators and Managers to deal with other important tasks. Thanks to its Domain & Workgroup support, GFI LanGuard it can handle any type and size of environment. If you haven’t used it yet, download your copy of GFI LanGuard and give it a try – you’ll be surprised how much valuable information you’ll get on your systems security & patching status and the time you’ll save!
Your IP address:
3.17.75.227
Wi-Fi Key Generator
Follow Firewall.cx
Cisco Password Crack
Decrypt Cisco Type-7 Passwords on the fly!


