How to Enable Master Control Panel or Enable God Mode in Windows 7, 8 & 8.1
Around 2007, an undocumented feature of Windows, called the God Mode, was published outside of documentation provided by Microsoft. This is the Windows Master Control Panel shortcut. Bloggers named it the All Tasks or the God Mode and it gained popularity as it provided a method of creating a shortcut to various control settings in Windows Vista at the time. Later Windows Operating Systems such as Windows 7, Windows 8 and Windows 8.1 also carry this feature, except the 64-bit version of Windows Vista. It is known that this functionality crashes the Explorer in the 64-bit version of Windows Vista.
Although not intended for use by general users, God Mode or Master Control Panel functionality in Windows is implemented by creating a base folder with a special extension. The format used is:
<FolderDisplayName>.{<GUID>}
Here, GUID represents a valid Class ID or CLSID that has a System.ApplicationName entry in the Windows Registry. Microsoft documents this technique as “Using File System Folders as Junction Points.” FolderDisplayName can be anything - when this technique was discovered, the name GodMode coined by bloggers stuck. Among the many GUID shortcuts revealed in Windows, the CLSID {ed7ba470-8e54-465e-825c-99712043e01c} is of special interest as the related widget points to and permits access to several Windows settings or Control Panel applets.
Users can now create a control panel called GodMode that allows them easy access to almost all the administrative tasks in Windows. In fact, GodMode is so named as users have complete access to all aspects of the management of Windows at their fingertips and in one location. That makes it very convenient to configure the hardware or windows settings quickly from a single screen. You access GodMode by creating a special folder on the desktop.
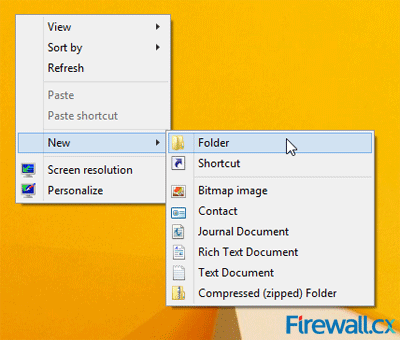
Arrive at the Windows desktop by closing all the open windows. Right-click on an empty part of the desktop or hold your finger there. In the menu that comes up, tap/click on New and then on the Folder option:
 Figure 1. Creating a New Folder
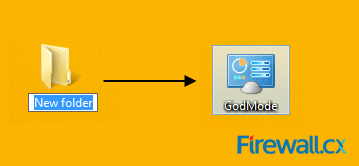
You will see a new folder appear on the desktop and the title of the folder will be in edit mode. Modify the title of the new folder, or rename it to:
GodMode.{ED7BA470-8E54-465E-825C-99712043E01C}
Once renames, the icon will change as shown below:
 Figure 2. Create a new folder & rename it to reveal GodMode
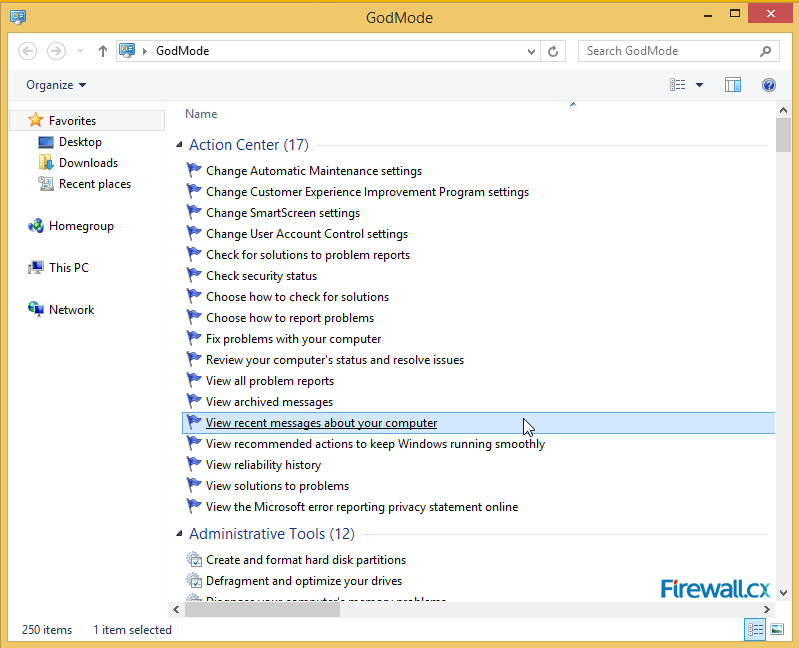
You must double-click/tap on the icon to open the GodMode Screen:
 Figure 3. The GodMode Screen
You can now proceed to tweak Windows using the list of available configuration options presented simply by scrolling through and tapping/clicking the option you want.
If you no longer need to have GodMode in your system, you can safely delete the GodMode folder on your desktop.
This article showed how to enable GodMode on Windows Vista (32Bit only), and both 32/64 Bit versions of Windows 7, Windows 8 and Windows 8.1.
Your IP address:
18.217.128.174
Wi-Fi Key Generator
Follow Firewall.cx
Cisco Password Crack
Decrypt Cisco Type-7 Passwords on the fly!


