Installation of a Cisco Catalyst 4507R-E Layer 3 Switch
Driven by our thirst for technical material and experience, we thought it would be a great idea to start presenting various installations of Cisco equipment around the globe, especially equipment that we don't get to play with everyday.
We recently had the chance to unpack and install a Cisco Catalyst 4507R-E Layer 3 switch, which we must admit was extremely impressive. The Cisco Catalyst series is world-known for its superior network performance and modularity that allows it to 'adapt' to any demands your network might have.
For those who haven't seen or worked with a 4507R/4507R-E switch, it's a very big and heavy switch in a metal cabinet (chassis) supporting up to two large power supplies and a total of 7 cards (modules), two of which are the supervisor engines that do all the switching and management work.
The new 4507R-E series is a mammoth switch that allows a maximum of 320Gbps (full duplex) switching capacity by utilising all 7 slots, in other words 5 modules alongside with two Supervisor Engine 6-E cards (with two full line rate 10Gb Uplinks).
The 4507R-E switch is shipped in a fairly large box 50(H)x44(W)x32(D) cm and weights around 21 Kgrs with its shipping box. The practical height of the unit for a rack is 11U which means you need quite a bit of room to make sure it's comfortably placed.
Unboxing the Cisco Catalyst 4507R
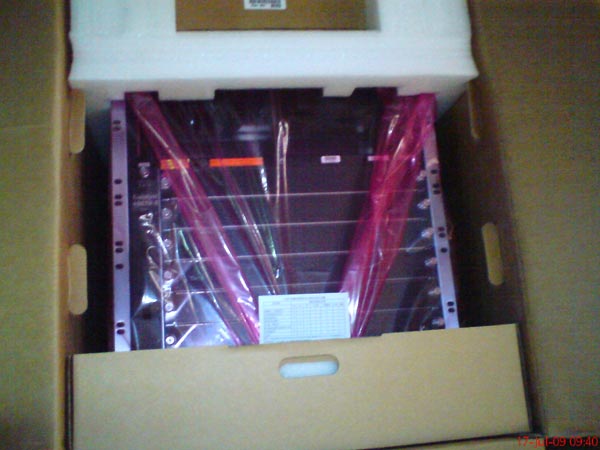
Like most Cisco engineers, we couldn't wait to open the heavy box and smell the freshly packaged item that came directly from Cisco's manufacturing line. We carefully moved the 4507R-E box to the datacenter and opened the top side of the box.....
The upper area of the picture is where you'll find the two large cube slots for the power supplies. Below them, you can identify 6 out of the 7 slots waiting to be populated and give this monster unbelievable functionality!
After opening the package and removing the plastic wrapping, we placed the switch on the floor so we could take a better look at it.
Because we couldn't wait any longer, we quickly opened one of two power supplies and inserted it into the designated slot. The power supplies installed were rated at 2800Watts each - providing more than enough juice to power a significant number of IP Phones via the PoE cards installed later on.
The picture below shows both power supplies, one inserted into its slot, while the other was placed on top of the chassis with its connectors facing frontwards so you can get a glimpse of them. When inserted into its slot, the power supply's bottom connectors plug firmly into the chassis connectors and power up the Catalyst switch:
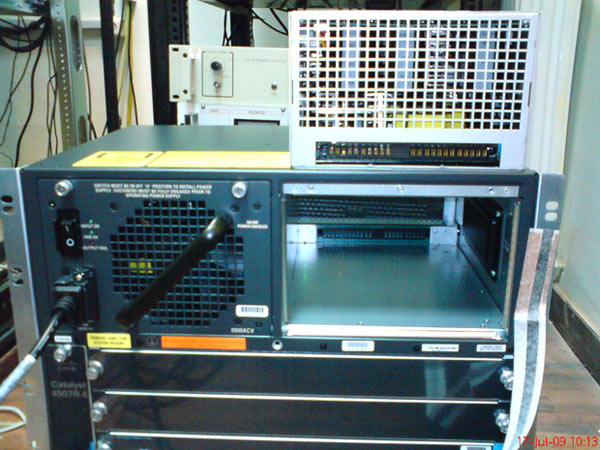
Turning on the power supplies for the first time made the datacenter's light dim instantantly as they began to draw power for the first time! Interestingly enough, if you take a look at the power supply on top of the chassis, you'll notice three long white strips inside the power supply. These are actually three very large electrolytic capacitors - quite impressive!
For those interested, the power supplies were made by Sony (yes, they had a Sony sticker on them!).
Supervisor Engine Line Card Installation
As we mentioned in the beginning of this article, the powering engine of any 4500 series Catalyst switch is the Supervisor Engine. The Supervisor engines occupy up to two slots on the 4507R chassis, one of them used for redundancy in case the other fails. When working with two supervisor engines, the 4507R is usually configured to automatically switch from one engine to the other without network interruptions, even for a VoIP network with active calls between ends.
Cisco currently has around 7 different Supervisor Engines, each with unique characteristics, designed for various levels of density and bandwidth requirements.
Currently, the Supervisor Engine 6-E is the best performing engine available, providing 320Gbps bandwidth (full duplex) and 250 million packets per second forwarding rate!
Our users can refer to our popular Cisco Catalyst 4500 Series Zero-Downtime IOS Upgrade Process for Supervisor Engine 7-E, 7L-E, 6L-E and V-10GE Redundant Configurations article to learn how to upgrade their Supervisor Engine without network service interruption.
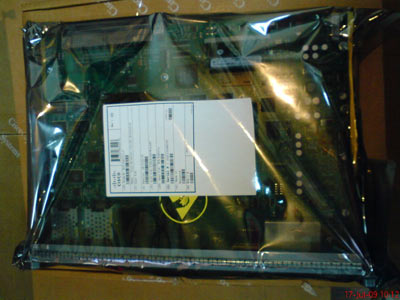
For our installation, we worked with the Supervisor Engine II-Plus, also known as Cisco part WS-X4013+. Here's one of the supervisor engines in its original antistatic bag:
After placing on my wrist the antistatic wrist-strap contained in the package and carefully unwrapping the supervisor engine, the green circuit-board with its black towers (heatsinks) is revealed. You can easily see the 5 heatsinks, two of which are quite large and do an excellent job in keeping the processors cool:
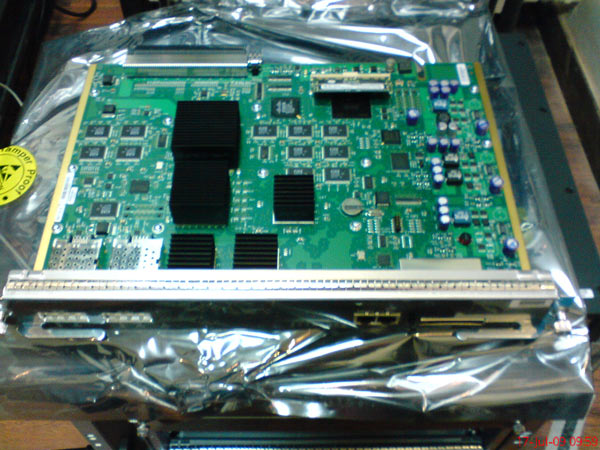
At the back left side of the board, you can see the supervisor engine's connector which is equally impressive with 450 pin connectors - 50 on each row!
We took a picture from the back of the board to make sure the connector was clearly visible:
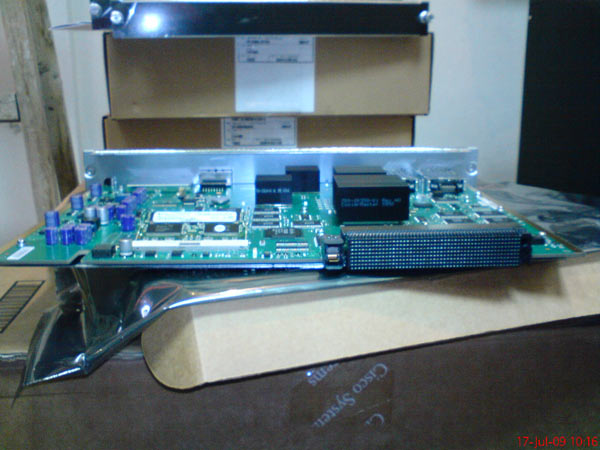
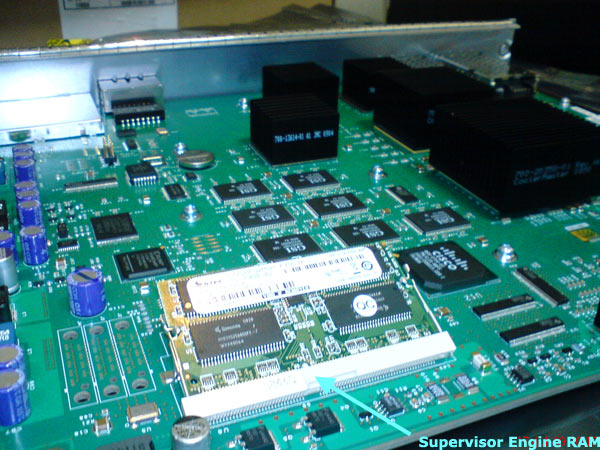
Just looking at the connector makes you imagine the number of signals that pass through it to give the 4507R-E the performance rating it has! On the left of the board's connector is the engine's RAM (256MB), while right behind it is the main CPU with the large heatsink, running at 266Mhz.
Here is a close up of the engine's RAM module. The existing 256MB memory module can be removed and upgraded according to your requirements:
Moving to the front side of the Supervisor Engine, you can see the part number and description:
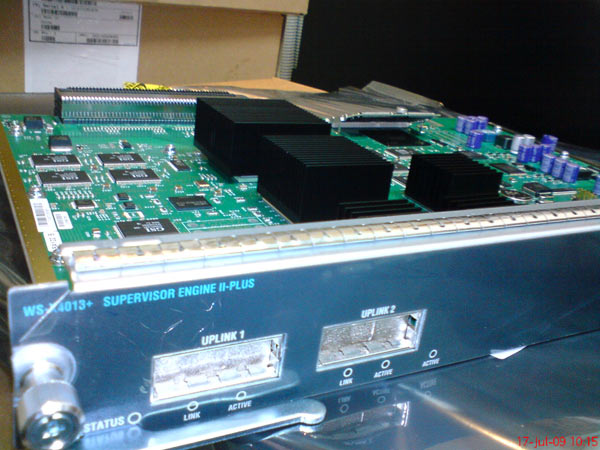
The uplink ports visible on the front are GBIC (GigaBit Interface Converter) that can be used as normal Gigabit interfaces. By using different GBIC's you can connect multimode, singlemode fiber optic cable or standard CAT5e/CAT6 Ethernet cabling. These ports can come in handy when you're approaching your switch's full capacity.
The impressive Supervisor Engine fits right into one of the two dedicated slots available on the 4507R-E chassis. These are slots 3 & 4 as shown in the picture below. Also visible is the switch's backplane and black connectors awaiting the Supervisor Engine boards (marked with red):
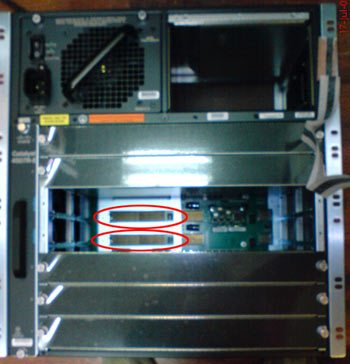
We took another picture inside the chassis to make things as clear as possible:
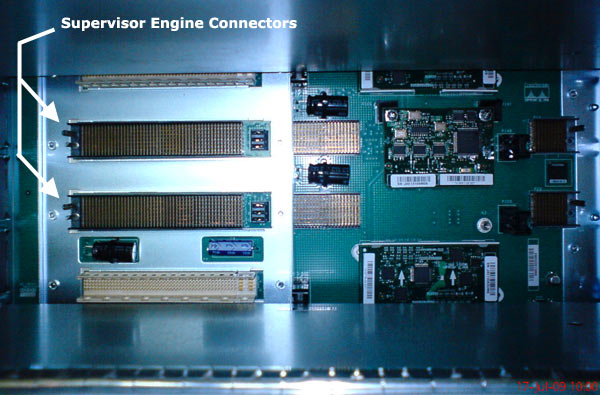
Here you can see the backplane with the two Supervisor Engine connectors. The white coloured connectors just above and below the Supervisor Engines are used by the rest of the boards available to the 4507R.
After inserting one of the Supervisor Engines and two power supplies, here is the result:
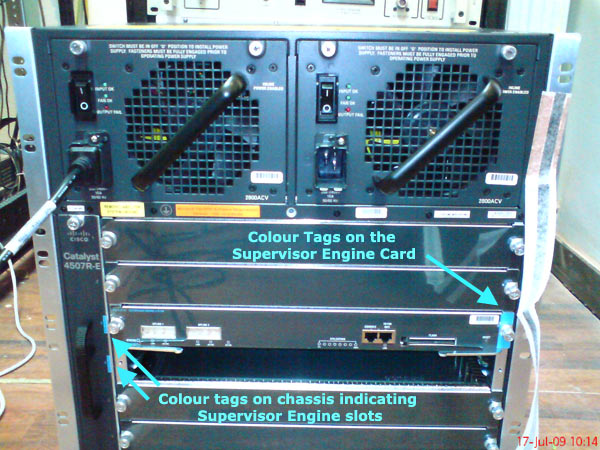
One detail well worth noticing is the colour coded bars on the left and right side of the Supervisor card. These colour codes exist to ensure engineers don't accidently try to insert a Supervisor card into an inappropriate slot. The 4507R-E can accept upto two supervisor engines, therefore you have two slots dedicated to them, leaving 5 slots available.
Cisco engineers have thought of everything on the 4507R-E. The cooling mechanisim is a good example of smart-thinking and intelligent engineering. With 7 cards installed on the system, pumping a generous amount of heat, the cooling had to be as effective as possible. Any heat captured between the cards could inadvertably lower the components' reliability and cause damage in the long term.
This challenge was dealt with by placing a fan-tray right next to the cards in a vertical direction. The fan-tray is not easily noticed when taking a quick glance, but the available handle on the front gives away that something is hidden in there. Unscrew the top & bottom bolts, place your hand firmly around the handle and pulling outwards will suprise you:
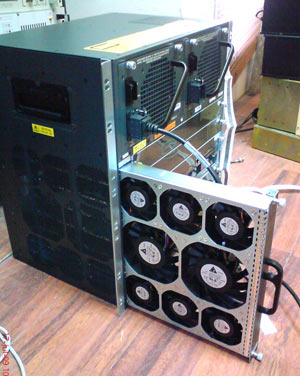
The picture taken on the left shows the eight fans placed on the fan-tray. These fans work full speed the moment you power the switch on, consuming 140Watts alone!
Once they start spinning, you really can't argue that the cooling is inadequate, as the air flow produced is so great that when we powered the 4507R-E, the antistatic bags accidently forgotten on the right hand side of the chassis were sucked almost immediately against the chassis grip, just at it happens when you leave a plastic bag behind a powerful fan!
Of course, anything on the left side of the chassis (vieweable in our picture) would be immediately blown away.
After inserting the fan-tray back in place, it was time to take a look around and see what else what left to play with.
Our eyes caught another Cisco box and we approached it, picked it up and checked out the label:
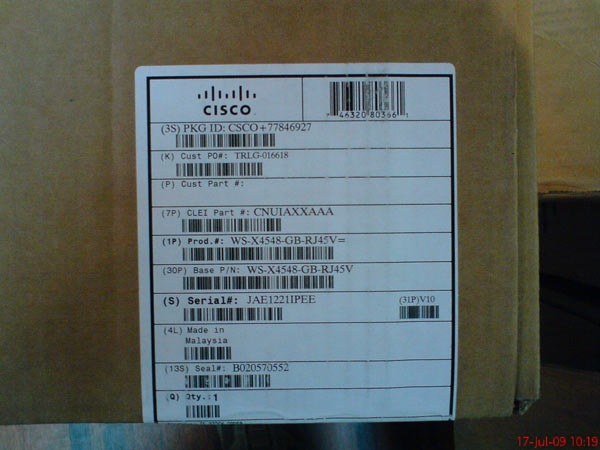
The product number WS-X4548-GB-RJ45V and size of the package made it clear we were looking at a card designated for the 4507R-E. Opening the package confirmed our thoughts - this was a 48port Gigabit card with PoE support:
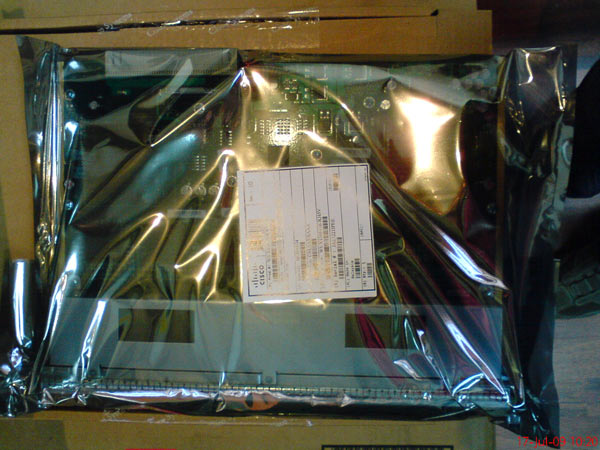
We carefully unwrapped the contents always using our antistatic wrist-strap so that we don't damage the card, and then placed it on top of its box:
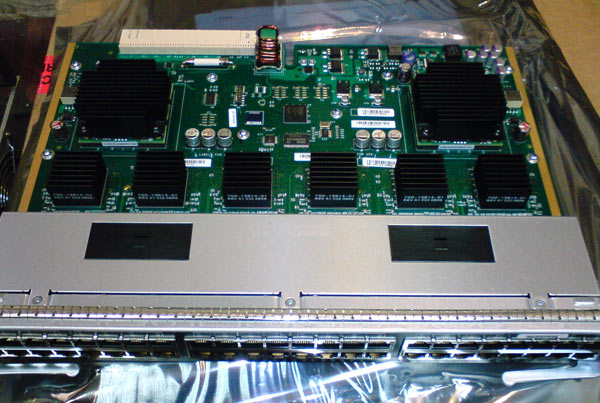
The card has an impressive quantity of heatsinks, two of which are quite large and therefore must generate a lot of heat. The backplane connector is visible with its white colour (back left corner), and right behind the 48 ports is an area covered with a metallic housing. This attracted our attention as we thought something very senstive must be in that area for Cisco to protect it in such a way.
Taking a look under the protective shield we found a PCB board that ran along the length of the board:
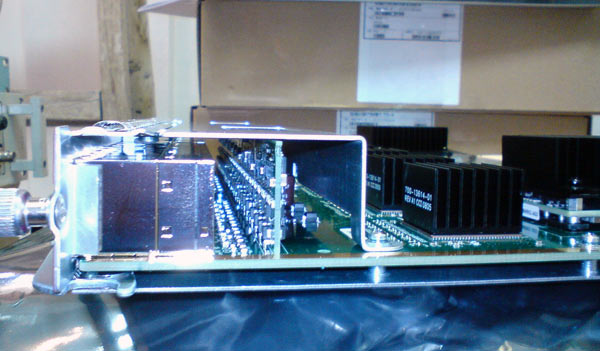
Our understanding is that this rail of PCB with transistors and other electrical circuits mounted on it seemed to be regulators for the PoE support. Taking into consideration that we didn't see the same protection in other similar non-PoE boards, we couldn't image it being something else.
When we completed our checkup, we decided it was time to install the card and finally power the 4507R-E switch.
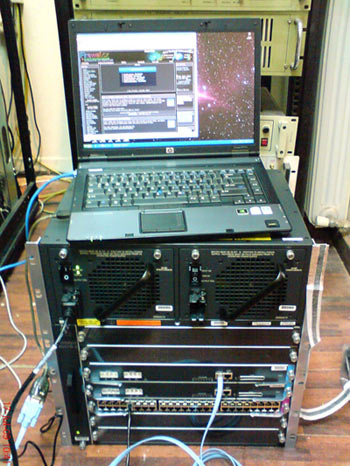
The picture on the left shows our 4507R-E installed with two Supervisor Engine II-Plus engines in active-standby redundancy mode and one 48 port Gigabit Ethernet card with PoE support.
On top is the editor's (Chris Partsenidis) laptop with a familair website loaded, Firewall.cx!
Configuring the Supervisor engines was a simple task. When the 4507R-E is powered on, both engines will boot by first performing a POST test on their modules, memory buffers etc. When this internal POST phase is successfully complete without errors, the engines begin to boot the IOS.
The screenshot below shows us the described procedure from one Supervisor engine since you can't monitor both engines unless you have one serial port connected to each supervisor's console port:
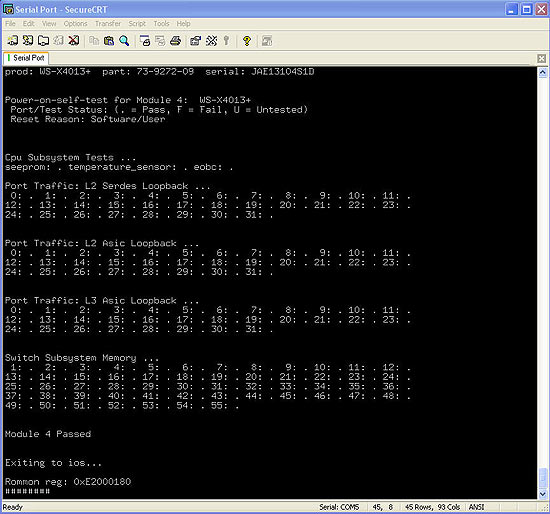
As shown above, the Supervisor engine passed all tests and then proceeded to boot the IOS.
Once loaded, the IOS will check for the existence of a second Supervisor engine, establish connection with it and, depending on which slot it is located in, it will automatically initialise the second engine in standby mode as shown below:
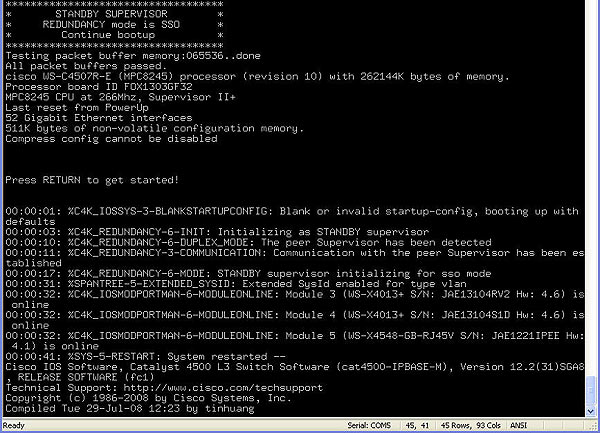
Once the Supervisor engine bootup process is complete, you are able to configure any aspect of the switch according to your needs, just as you would with any other Cisco Catalyst switch. The interesting part is when you try to save your configuration:

In the above screenshot, we've configured the switch to boot using a specific IOS located in the bootflash, as soon as we saved the configuration using the wr command, the Supervisor engine automatically synchronised the two engines' nvram without any additional commands. This excellent functionality makes sure that whatever configuration is applied to the active Supervisor engine will be available to the standby engine should the first one fail.
The great part of this switch is that you can obtain any type of information you require from it. For example, we switched off one of the two power supplies and executed the show modules command. This command gives a report of the installed modules (cards) in the catalyst switch along with a few more details:
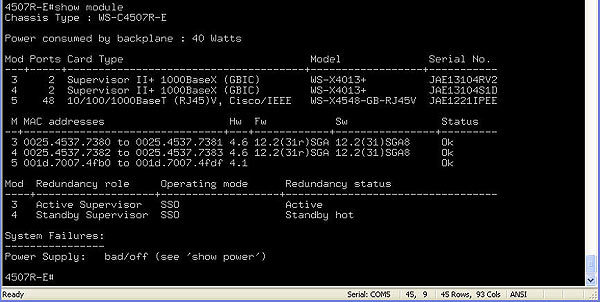
The command reveals that the backplane power consumption is approximately 40 Watts followed by a detailed report of the installed modules. In our example, you can see the two Supervisor engines in slot 3 & 4, followed by the 48 Gigabit Ethernet module in slot 5. The command also shows the Supervisor engines' configured redundany operating mode and status. Lastly, any system failures are reported at the end - this output shows that we've got a problem with one of the power supplies, but rest assured, we had simply switched it off to see if it was going to show up in the report!
Summary
This article covered the initial installation and setup of a new Cisco Catalyst 4507R-E switch, populated with two Supervisor Engines II-Plus and a 48 port Gigabit module with PoE support. We saw areas of the switch which you won't easily find elsewhere and our generous amount of pictures made sure you understood what the 4507R-E looks like, inside and out! Lastly, we saw the switch bootup procedure and Supervisor engine POST test and syncronization process.
Your IP address:
3.148.189.47
Wi-Fi Key Generator
Follow Firewall.cx
Cisco Password Crack
Decrypt Cisco Type-7 Passwords on the fly!


