Configuring Cisco SSL VPN AnyConnect (WebVPN) on Cisco IOS Routers
Our Web SSL VPN article written back in 2011 introduced this new wave of VPN services. This article extends the topic by covering the installation and configuration of Cisco’s SSL AnyConnect VPN for Cisco IOS Routers.
Web SSL VPN delivers the following three modes of SSL VPN access:
• Clientless - Clientless mode provides secure access to private web resources and will provide access to web content. This mode is useful for accessing most content that you would expect to access in a web browser such as Internet access, web-based intranet, webmail etc.
• Thin Client (port-forwarding Java applet) - Thin client mode extends the capability of the cryptographic functions of the web browser to enable remote access to TCP-based applications such as Post Office Protocol version 3 (POP3), Simple Mail Transfer Protocol (SMTP), Internet Message Access protocol (IMAP), Telnet and Secure Shell (SSH).
• Tunnel Mode (AnyConnect Secure Mobility Client) - Full tunnel client mode offers extensive application support through its dynamically downloaded Cisco AnyConnect VPN Client (next-generation SSL VPN Client) for SSL VPN. Full tunnel client mode delivers a lightweight, centrally configured and easy-to-support SSL VPN tunneling client that provides network layer access to virtually any application.
The advantage of SSL VPN comes from its accessibility from almost any Internet-connected system without needing to install additional desktop software.
Introducing Cisco SSL AnyConnect VPN - WebVPN
Cisco SSL AnyConnect VPN is a real trend these days – it allows remote users to access enterprise networks from anywhere on the Internet through an SSL VPN gateway using a web browser. During the establishment of the SSL VPN with the gateway, the client downloads and installs the AnyConnect VPN client from VPN gateway. This feature allows easy access to services within the company’s network and simplifies the VPN configuration on the SSL VPN gateway, reducing dramatically the administrative overhead for system administrators.

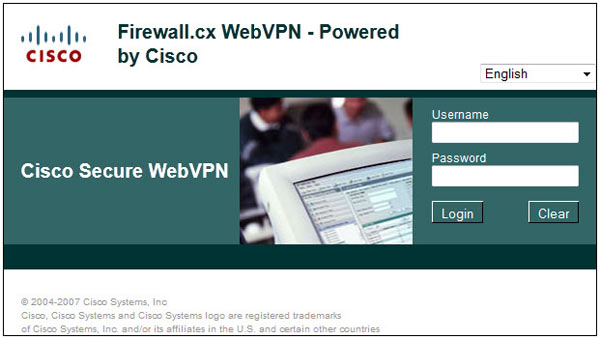
The Cisco secure WebVPN router login screen
The Cisco SSL AnyConnect VPN client was introduced in Cisco IOS 12.4(15)T and has been in development since then. Today, Cisco SSL AnyConnect VPN client supports all Windows platforms, Linux Redhat, Fedora, CentOS, iPhones, iPads and Android mobile phones.
Regardless of the client (PC, smartphone etc), the router configuration remains the same, while the appropriate VPN client software is downloaded by the client connecting to the VPN gateway (router).
Smartphones such as iPhones (iPAD included) and Android can download the Cisco VPN AnyConnect Secure Mobility Client directly from iTunes (Apple) or the Google Play store respectively (android phones). To download it, connect to your store and search for ‘Cisco AnyConnect’.
To download VPN AnyConnect Secure Mobility Client packages files for Windows, MacOS X and Linux platforms, free, simply visit our Cisco Download section. The latest version of the client was made available at the time of writing this article.
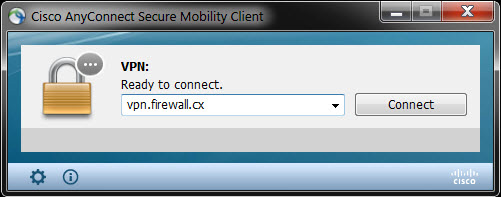
Once our client is downloaded and installed on our Windows 7 workstation it will be ready to initiate the VPN connection to our VPN Gateway:

Steps To Configure & Enable SSL AnyConnect VPN Secure Mobility Client
- Upload AnyConnect Secure Mobility Client to our Cisco Router
- Generate RSA Keys
- Declare the Trustpoint & Create Self-Signed Certificate
- Configure WebVPN Pool IP addresses assigned to the VPN Users
- Enable and Configure AAA Authentication for SSL VPN & Create User Accounts
- Enable WebVPN License
- Configure and enable WebVPN Gateway
- Configure and enable SSL VPN Context
- Configure default group policy, authentication list and final parameters for WebVPN
Uploading AnyConnect Secure Mobility Client Package To Our Cisco Router
The first step is to upload the Cisco AnyConnect client to the router’s flash memory. Depending on the type of clients you might need to upload more than one VPN AnyConnect client package. For our article, we will be using the latest VPN AnyConnect client for Windows, which at the time of writing was version 3.1.00495 (anyconnect-win-3.1.00495-k9.pkg). Cisco AnyConnect VPN client is available for download in our Cisco Download Section.
Generate RSA Keys
The next step is to generate our RSA 1024bit keys. The crypto key generate rsa command depends on the hostname and ip domain-name commands. This crypto command generates a Rivest, Shamir, Adleman (RSA) key pair, which includes one public RSA key and one private RSA key, with a key modulus size of 1024 (usually):
Declare The Trustpoint & Create Self-Signed Certificate
Once complete, we need to declare the trustpoint that the router should use by using the command crypto pki trustpoint command in global configuration mode. When declaring a trustpoint, we can specify certain characteristics in its subcommands as shown in our configuration:
Configure WebVPN Pool IP Addresses
WebVPN users will need to be assigned a LAN IP address so they can communicate with our network. The following command specifies the pool of ip addresses that will be assigned to our users. This can be either part of our LAN network or a completely different network. Since we have plenty of spare IP addresses, we’ll be using a small portion of them:
Note we have named this pool webvpn-pool.
Enable & Configure AAA Authentication for SSL VPN - Create User VPN Accounts
AAA stands for Authentication, Authorization and Accounting. We need to enable AAA in order to use it for our user authentication.
aaa authentication login sslvpn local
username chris secret firewall.cx
It could be that AAA is already enabled on the router, in which case we only need to define an authentication list (we named it ‘sslvpn’) to use the router’s local user database for user authentication.
Enable WebVPN License
When the WebVPN service is enabled for the first time on an ISR Generation 2 Cisco router (1900, 2900 & 3900 series), with the 15.x version IOS software or newer, the router will prompt us to accept the End-User License Agreement (EULA) before enabling and activating the service.
It is imperative to accept the EULA in order to proceed:
PLEASE READ THE FOLLOWING TERMS CAREFULLY. INSTALLING THE LICENSE OR
LICENSE KEY PROVIDED FOR ANY CISCO PRODUCT FEATURE OR USING SUCH
PRODUCT FEATURE CONSTITUTES YOUR FULL ACCEPTANCE OF THE FOLLOWING
TERMS. YOU MUST NOT PROCEED FURTHER IF YOU ARE NOT WILLING TO BE BOUND
BY ALL THE TERMS SET FORTH HEREIN.
……. Output omitted
Activation of the software command line interface will be evidence of
your acceptance of this agreement.
ACCEPT? [yes/no]: yes
After accepting the EULA, we can verify the WebSSL VPN service is activated by issuing the show license all command. Usually StoreIndex 4 contains the WebSSL VPN reference:
Notice the License Type mention: EvalRightToUse. This means that this is an evaluation license, a license to evaluate. At the end of the 8 ½ week evaluation period, the ISRG2 Cisco router license will not terminate the Web SSL_VPN license, and it will continue to work.
Configure & Enable WebVPN Gateway
After taking care of the licensing it’s time to begin working on the WebVPN Virtual Gateway configuration. The WebVPN Virtual Gateway enables the interface or IP address and port number to which the WebVPN service will ‘listen’ for incoming connections and also determines the encryption that will be used.
Note: If the interface the WebVPN will be running on has a dynamic IP address, for example Dialer0 (ATM ADSL Interface), the ip address 74.200.90.5 port 443 command can be replaced with ip interface Dialer0 port 443, where ‘Dialer0’ is the dynamic interface.
For those interested in reading up on this bug, Cisco has assigned bug ID: CSCtx38806 with the description "IOS SSL VPN fails to connect after microsoft security update KB258554".
Configure & Enable SSL VPN Context
The SSL VPN context is used to configure a number of parameters for our Web VPN server, these include:
- Gateway and domain associated
- AAA user authentication method
- Group policy associated
- The remote user portal (web page)
- Limit number of WebVPN SSL user sessions
Most of these parameters are configured in our group policy. This group policy is then set as the default-group policy for our Web SSL VPN.
Let’s explain what all the above commands do:
The webvpn context command is used to create a context named which we have named Cisco-WebVPN. The title command sets the text that will be displayed at the web browser’s Page Title and at the top of the login screen.
The acl “ssl-acl” command configures the access lists for this context. It basically governs what the web vpn users will have access to. We’ve provided our webVPN users full access to the 192.168.9.0 network.
Our webvpn users' IP addresses have already been defined in the webvpn-pool (192.168.9.80 to 192.168.0.85). Instead of typing each IP address within that range into our ACL list we simply configure the router to allow the 192.168.9.0 network as a source and destination in our VPN tunnel. This ensures any IP in the 192.168.9.0 range assigned to our vpn clients will have access to our LAN (192.168.9.0)
The login-message command defines the text that will be shown in the login section of the webvpn webpage. These messages are also visible in our WebVPN login screen at the beginning of our article.
Since our webvpn pool is part of the same network we just set the 192.168.9.0 network as the source and destination IP address.
Next, we define a group policy. The group policy configures a number of important parameters. We named our group policy webvpnpolicy.
The functions svc-enabled & svc-required commands ensure tunnel-mode is enabled and required. The combination of these two commands will force the VPN user’s PC to start downloading the AnyConnect software client as soon as he authenticates successfully. This is called tunnel-mode operation.
Alternatively, without the svc-required command, a webpage will be presented from which the user can directly launch any configured web service in our webvpn portal or selectively initiate tunnel-mode and start downloading the AnyConnect software client.
Note: The acronym SVC stands for SSL VPN Client
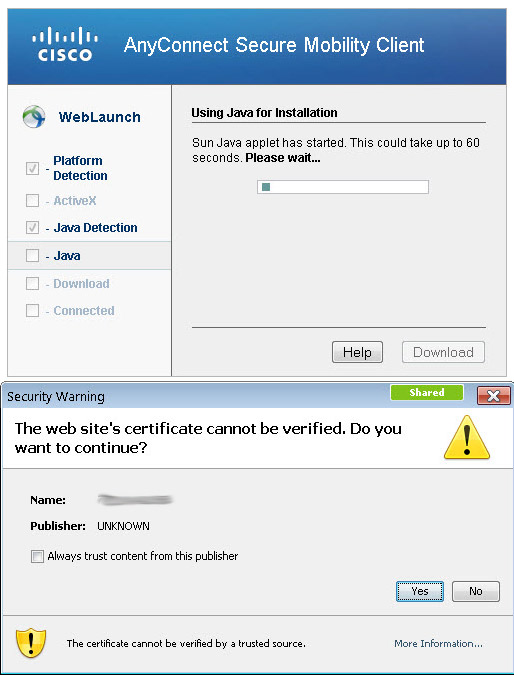
The screenshot below shows the AnyConnect Secure Mobility Client installation process. Keep in mind that these screenshots apply after the complete configuration of our router's SSL WebVPN service:

During the installation, the user will receive a number of prompts & security warnings about the publisher and website’s certificate verification. Administrators and engineers should instruct their VPN users to accept/allow the installation of the certificates and software client when prompted.
Shortly after the acceptance of certificates and confirming to the web browser to allow the installation of the client, the AnyConnect Secure Mobility Client Downloader will begin:

The filter tunnel ssl-acl command instructs the webvpn gateway to use ssl-acl access list to define the access vpn users will have.
The svc address-pool command defines the pool that will be used to assign IP addresses to our vpn users.
The svc rekey method new-tunnel specifies that the SVC establishes a new tunnel during SVC rekey.
The svc split command enables split tunneling, instructing which network traffic will be sent through the vpn tunnel. If this command is not included, vpn users will not be allowed to access the Internet while connected to the vpn.
Configure Default Group Policy, Authentication List & Final Parameters
Now we will configure the policy we just created as the default policy, set the aaa authentication list (sslvpn) to be used for user authentication and maximum users for the service. Lastly, we enable our webvpn context:
The ssl authenticate verify all command enables SSL configurations for backend server connections. While we are not using any such backend services, it’s a good option to always have enabled.
Supporting Multiple Group Policies on AnyConnect
Administrators and engineers who have worked with the classic Cisco IPSec VPN client will wonder how they can support multiple groups with different access rights using AnyConnect. The fact is that AnyConnect does support multiple groups, however it requires a radius server at the backend.
AnyConnect on a Cisco router without a radius server will only allow support for one group policy.
Complete WebVPN SSL AnyConnect Configuration
Finally, below is the complete Web VPN SSL AnyConnect configuration of our router:
aaa authentication login sslvpn local
!
username chris secret firewall.cx
!
crypto key generate rsa label my-rsa-keys modulus 1024
!
crypto vpn anyconnect flash0:/webvpn/anyconnect-win-3.1.00495-k9.pkg sequence 1
This concludes our Cisco SSL VPN AnyConnect configuration for Cisco IOS Routers.
Your IP address:
18.216.82.12
Wi-Fi Key Generator
Follow Firewall.cx
Cisco Password Crack
Decrypt Cisco Type-7 Passwords on the fly!


